Set Up Paid Traffic
From a tracking domain to ROAS: one campaign set up step by step, with sales reported back to the network.
This guide sets up the whole loop for one ad campaign: the ad link records the click, the lead knows which ad it came from, the sale is reported back to the network, and Reports show spend next to revenue.
It takes about twenty minutes, most of it waiting for DNS. If you want the ideas first, read How click tracking works.
- A EventsIQ form that is already routed. If you do not have one yet, start with Your first website form.
- A landing page where that form is embedded.
- Access to your domain's DNS settings, to add one CNAME record.
- An ad account on Meta, TikTok, Snapchat or Google that you can log in to.
The setup at a glance
Steps 1, 4 and 9 are optional. Without a tracking domain your campaign sends clicks straight to your page, and without postbacks only sales made inside EventsIQ's waterfall are reported.
Step 1: Add a tracking domain
A tracking domain is a subdomain of yours that your ad links point at. Using your own domain keeps the link trusted by browsers and ad networks, and lets EventsIQ record every click.
- Go to Settings → Domains and click Add domain.
- Type a subdomain, for example
track.yoursite.com. A bare domain likeyoursite.comis refused, because it would take over your whole site. - Open the new row. Under Add this record at your DNS provider you will see a CNAME record. Copy its Name and Value into your DNS provider.
- Come back and click Check again. The status moves from Waiting for DNS to Issuing certificate to Live.
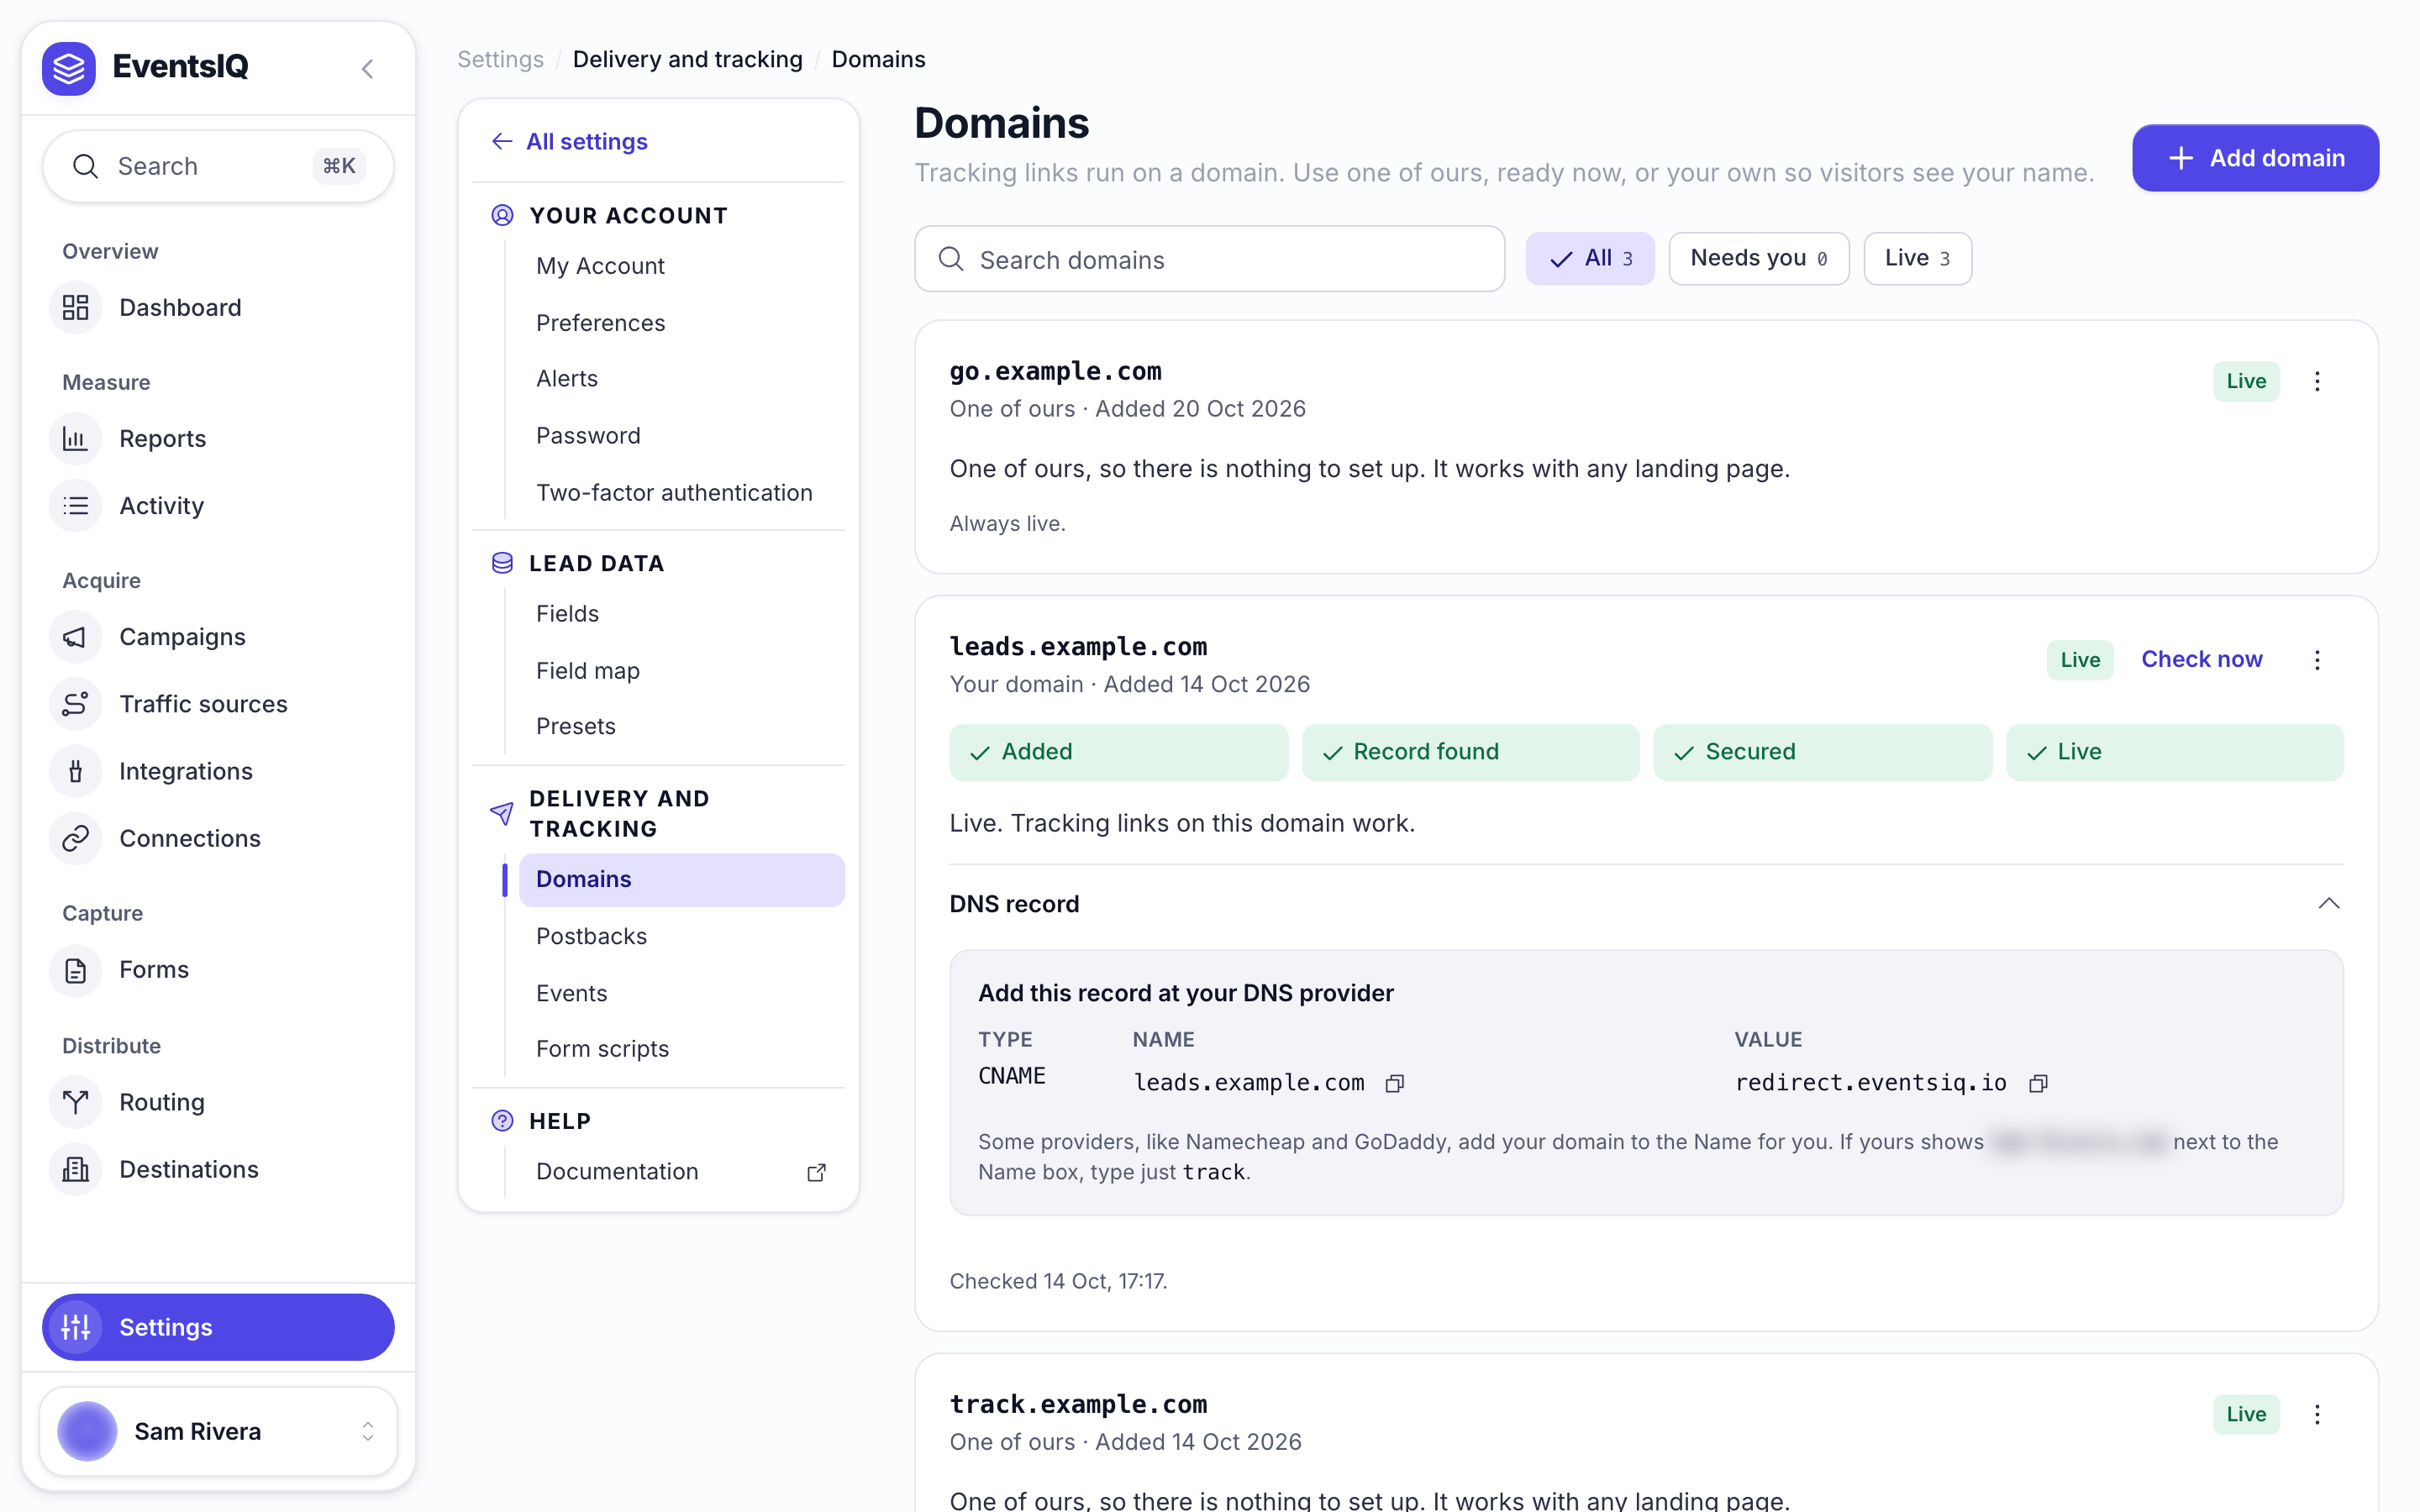
Some providers add your domain to the name for you. If yours does, enter just the first part, for
example track, not track.yoursite.com. The row tells you when this applies.
Most records are picked up in a few minutes, some take an hour. The status only refreshes when you click Check again, so click it again after a few minutes.
Step 2: Connect the ad account
Go to Acquire → Connections and click Connect Meta, Connect TikTok, Connect Snapchat or Connect Google. Log in and approve everything the network asks for. EventsIQ uses this one connection to read spend and to send conversions.
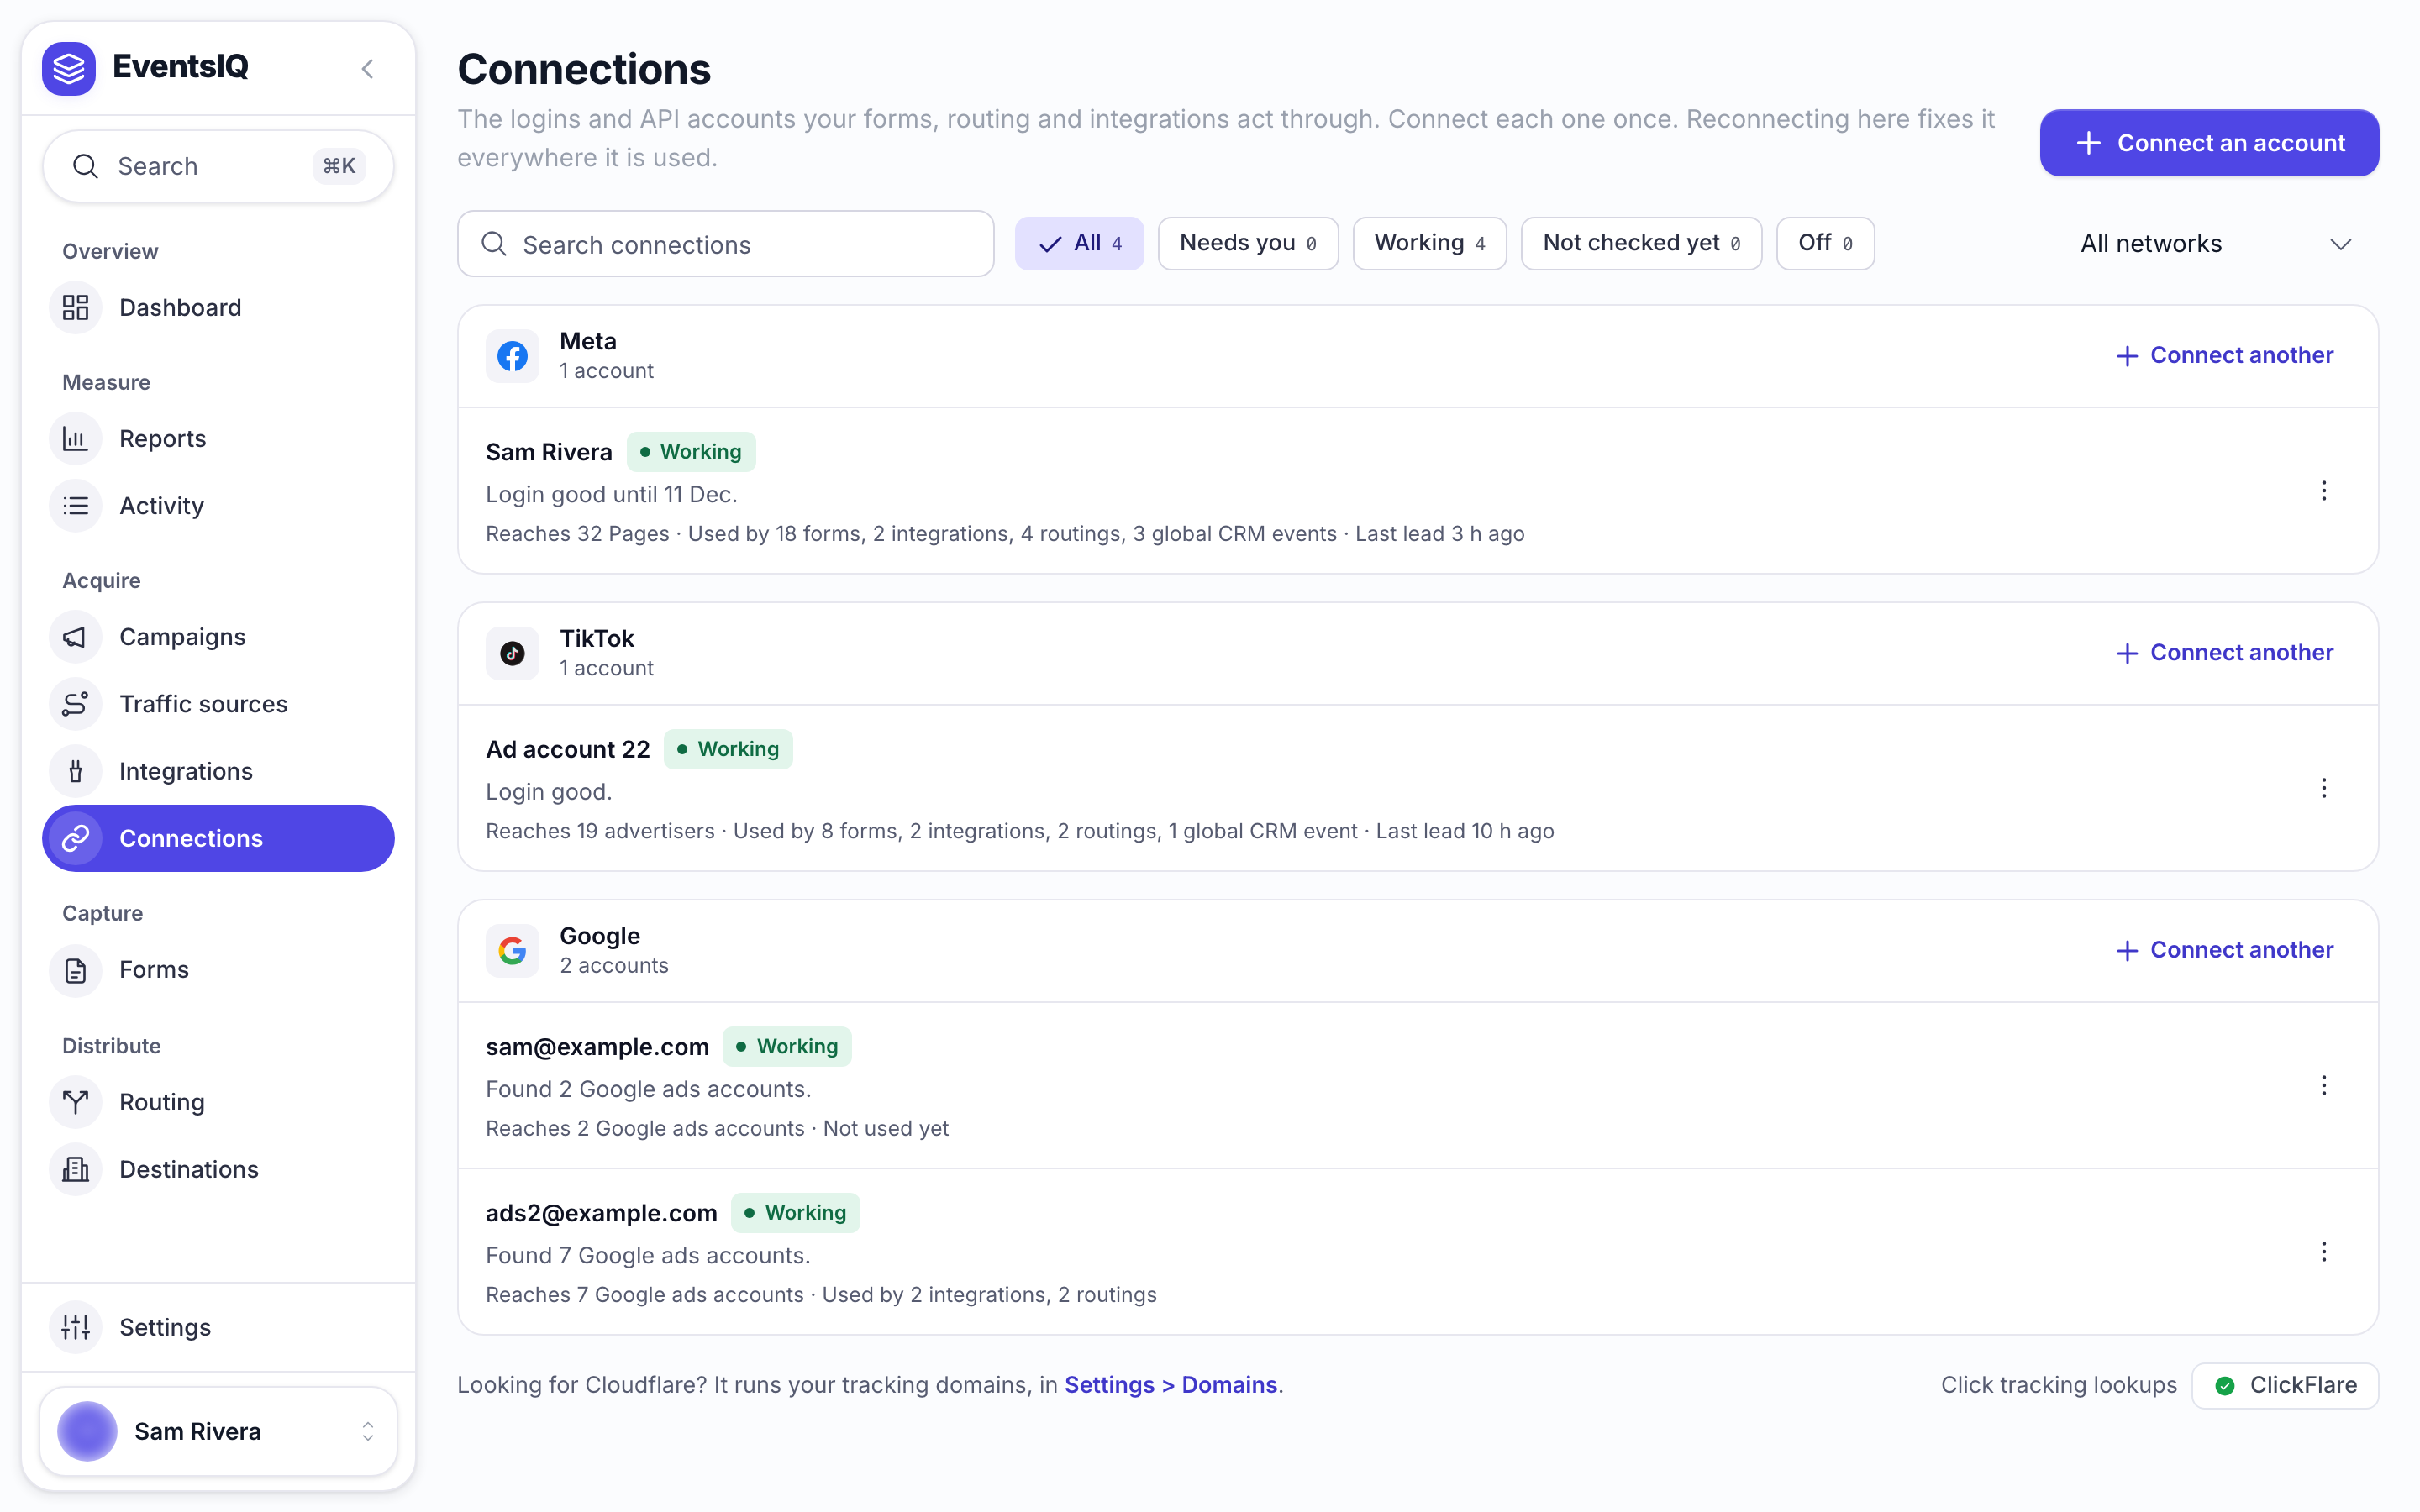
See Connections for what each network's grant is used for.
Step 3: Create a traffic source
A traffic source describes one ad network: which network it is, the currency it reports spend in, and which of its macros fill which EventsIQ field.
- Go to Acquire → Traffic sources and click New traffic source.
- Give it a Name, for example
Meta - Solar US. - Pick the Network. The Parameters table fills itself with that network's macros, such as
{{campaign.id}}for Meta or{campaignid}for Google. - Pick the Reporting currency: the currency your ad account is billed in.
- Save.
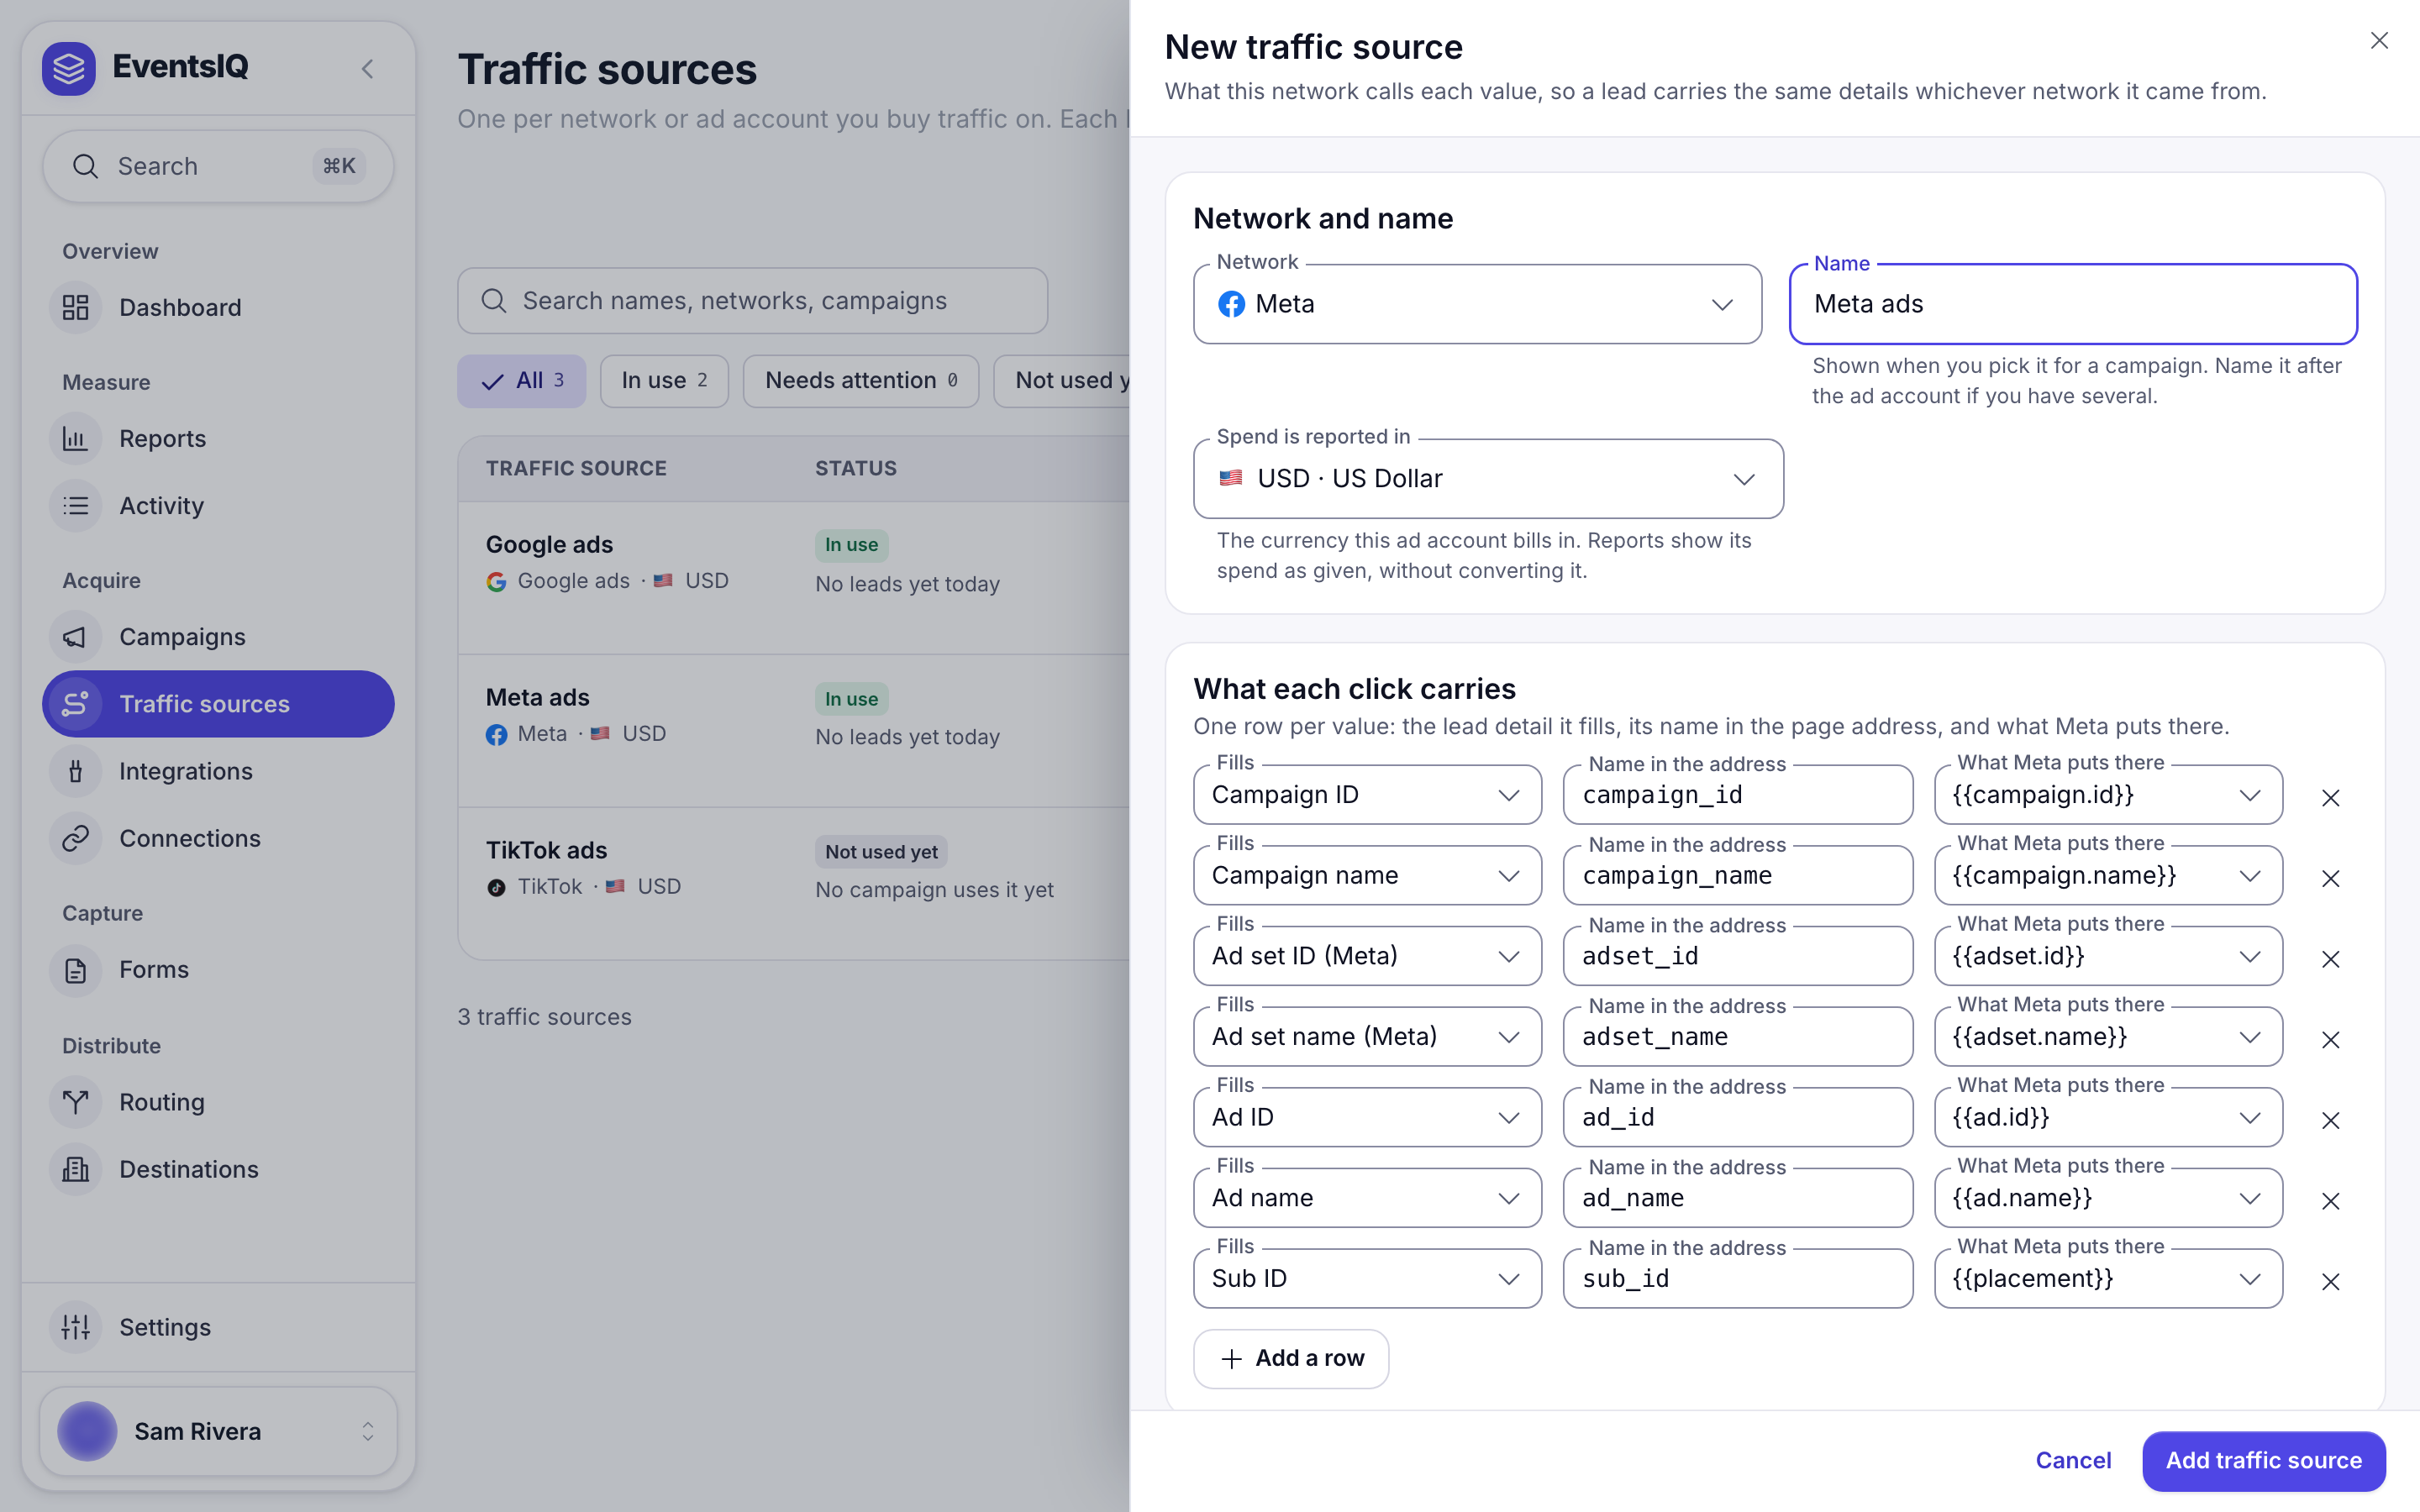
The campaign id is what joins spend to leads. You can add, rename or remove other rows, but keep the one that fills campaign_id, or Reports cannot match this network's spend to anything.
Step 4: Define your postback events
Skip this step if every sale happens inside EventsIQ's waterfall. Do it if your CRM decides later whether a lead became a sale.
- Go to Settings → Postbacks.
- Under Events, click Add event.
- Name your CRM sends: the word your CRM will put in the postback, for example
sold. - What to call it here: a readable name, for example
Sold. - Value: Whatever the CRM sends, The same every time (then fill in Amount), or No value at all.
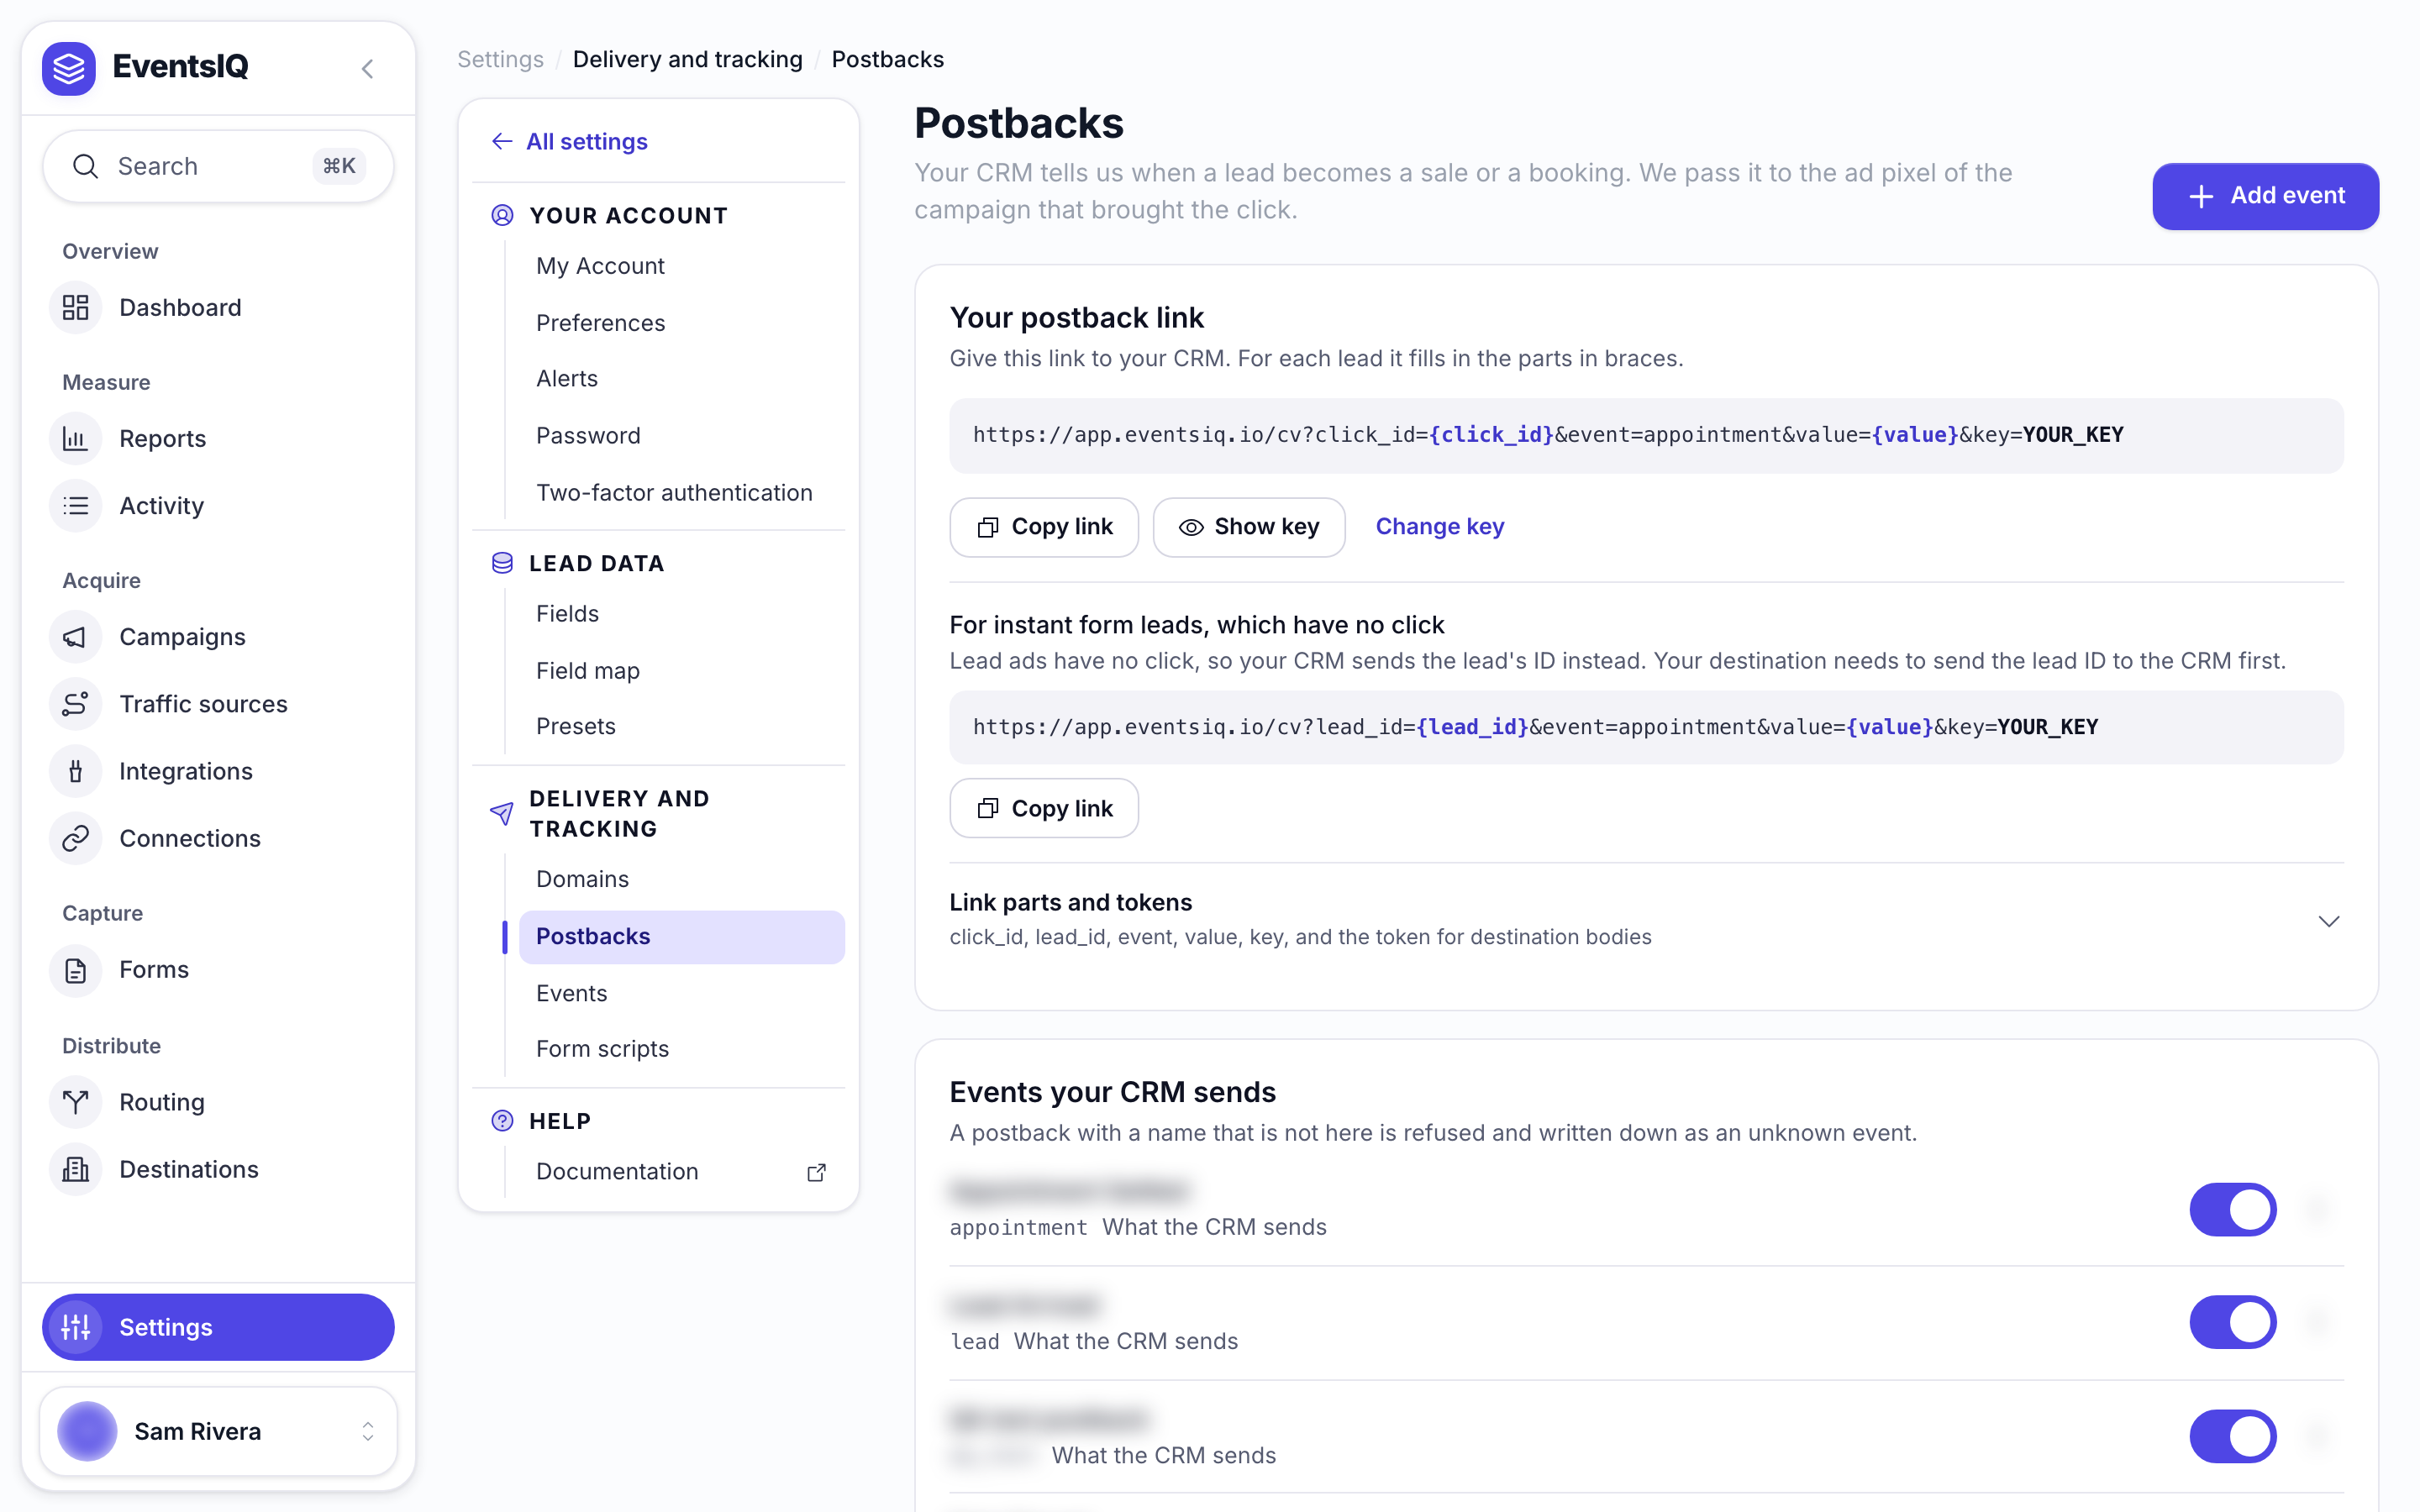
Leave this page open. You will need Your postback link at the top in step 9.
Step 5: Create the integrations
Integrations decide where EventsIQ sends conversions and where it reads spend from. Go to Acquire → Integrations.
Cost tracking
- Open the Cost tracking tab, click New integration and pick Cost tracking.
- Pick the Traffic source from step 3 and the Connection from step 2.
- Tick the Ad accounts to read. TikTok calls them Advertiser accounts.
- Leave Run every at 60 minutes unless you have a reason to change it, and save.
Conversion API
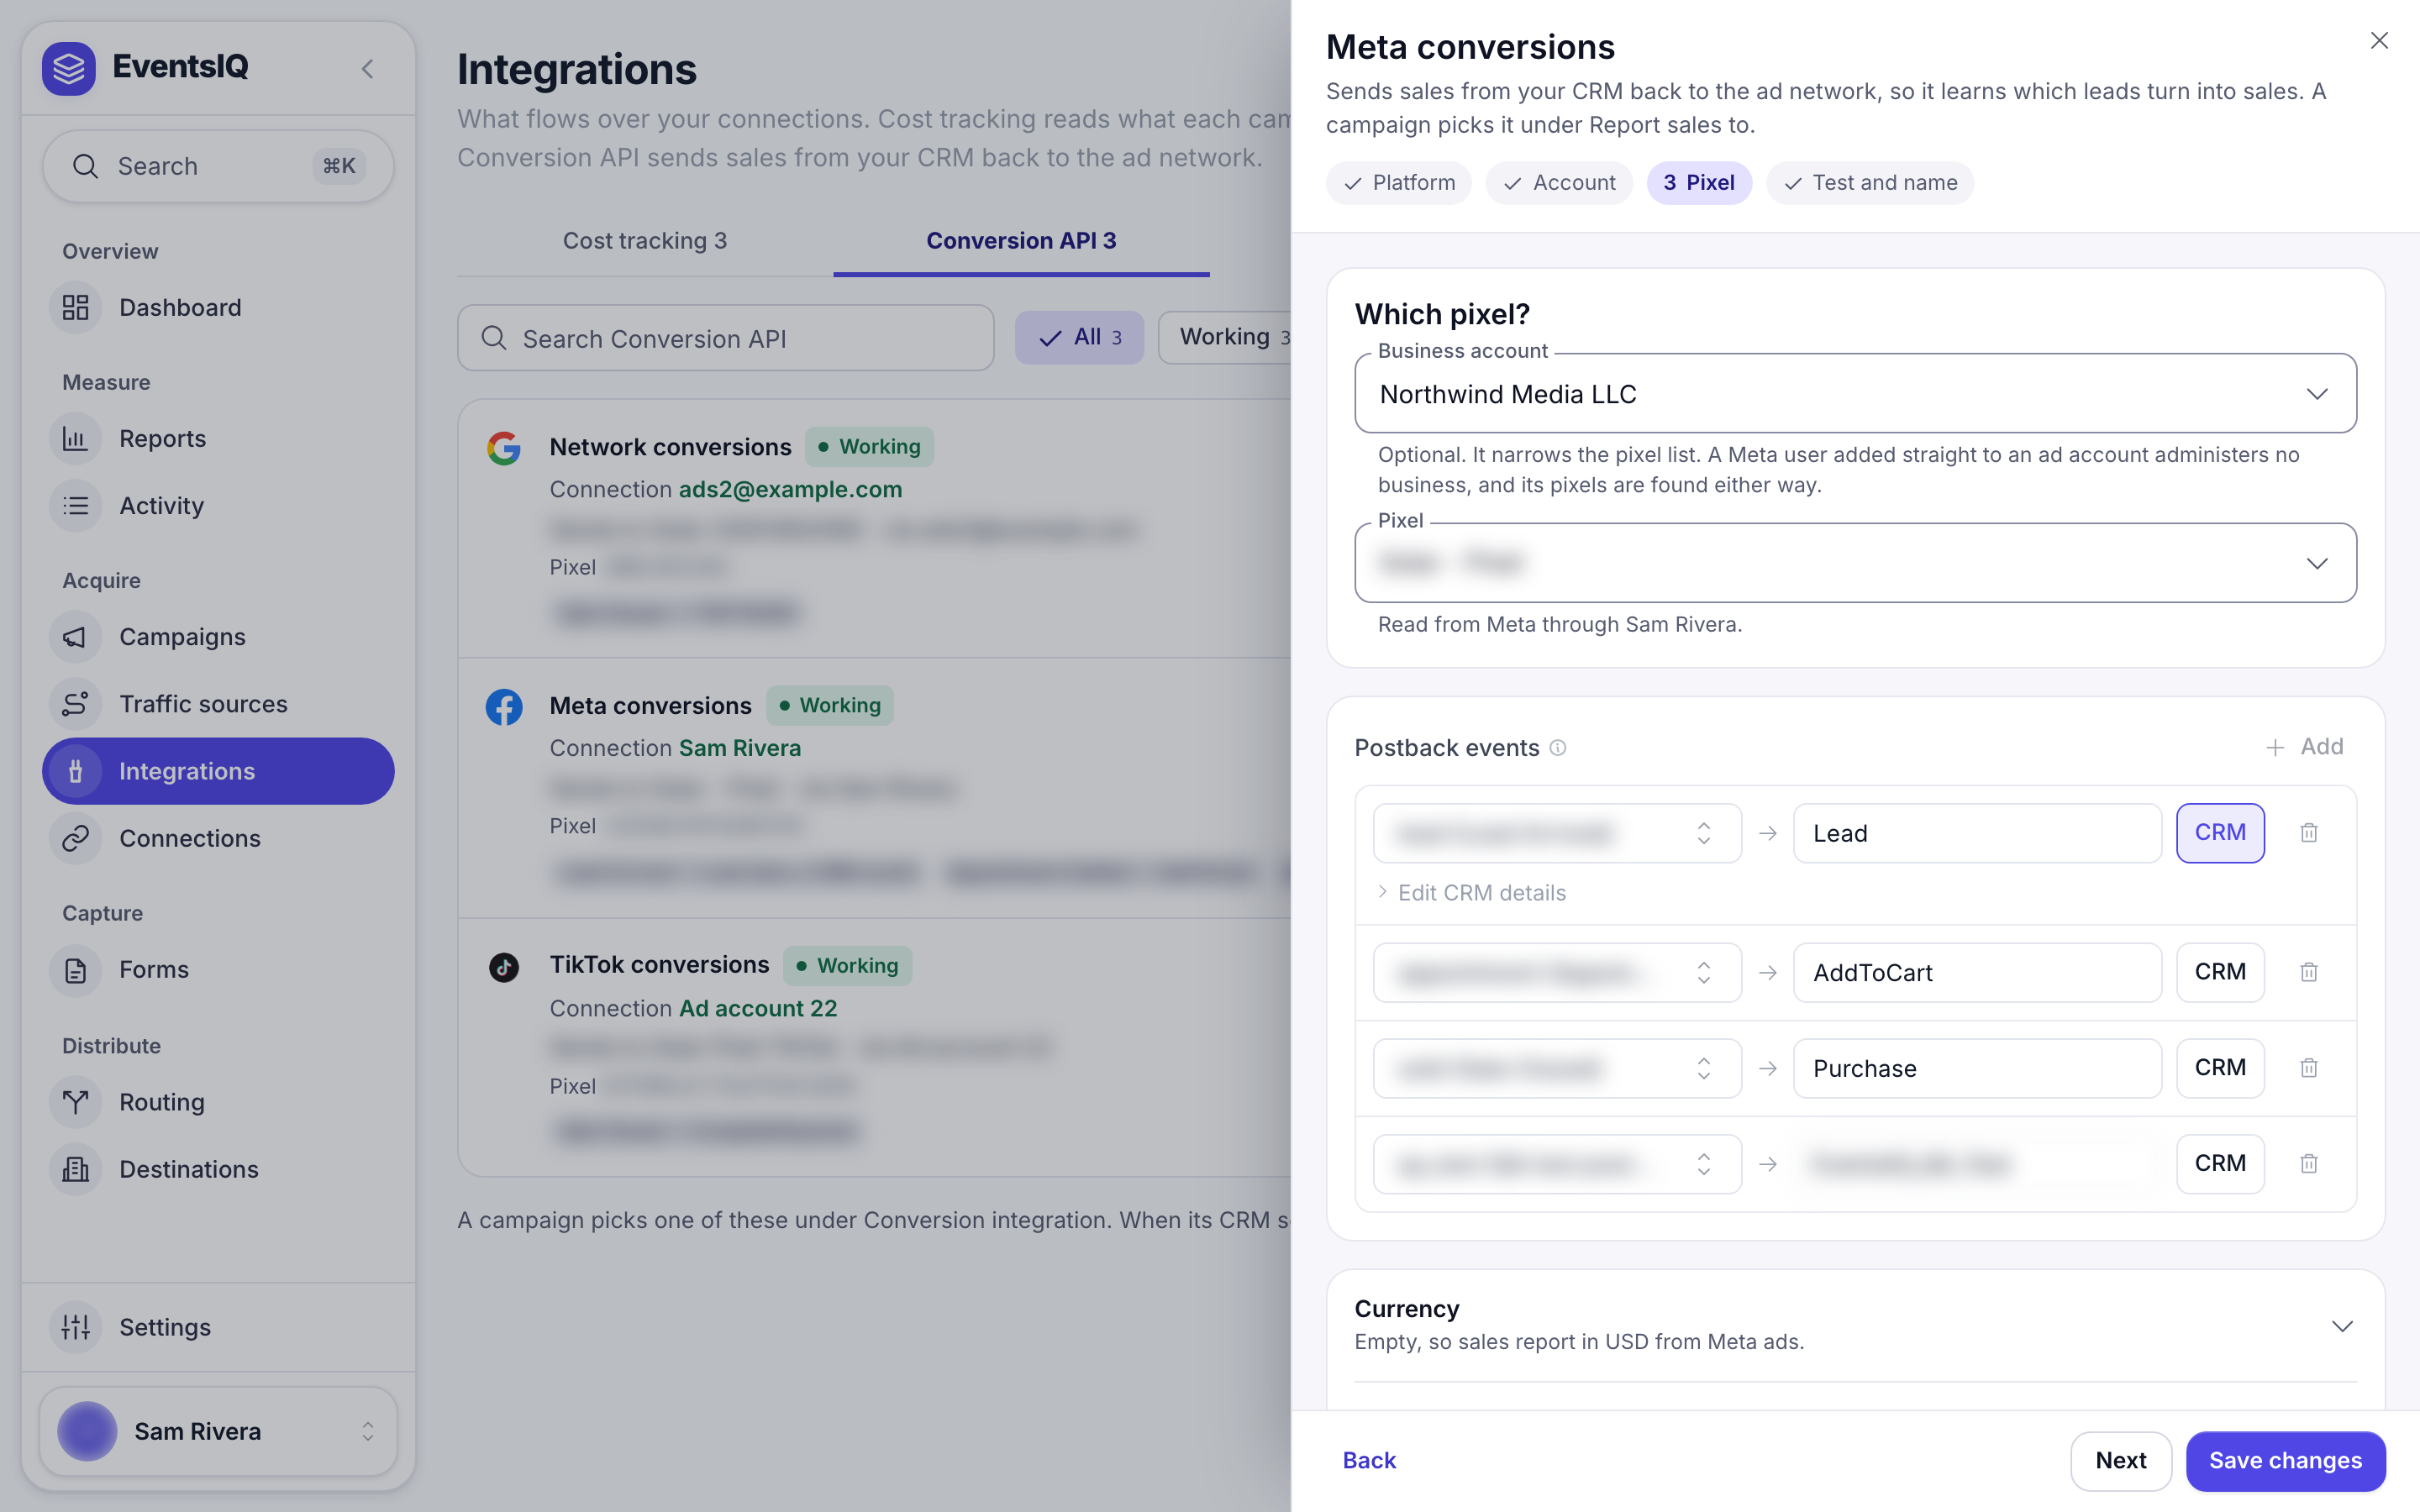
- Open the Conversion API tab, click New integration and pick Conversion API.
- Pick the same Traffic source and Connection.
- Choose where conversions go: a Pixel for Meta, TikTok or Snapchat, or a Google Ads account for Google.
- Under Postback events, add a row for each event from step 4 and say what the network should
call it. For Meta that is usually
PurchaseorLead. For Snapchat you pick from its list, for examplePURCHASE. For Google you pick one of your Import from clicks conversion actions. - Save.
See Integrations for every field.
Step 6: Create the campaign
Go to Acquire → Campaigns and click New campaign.
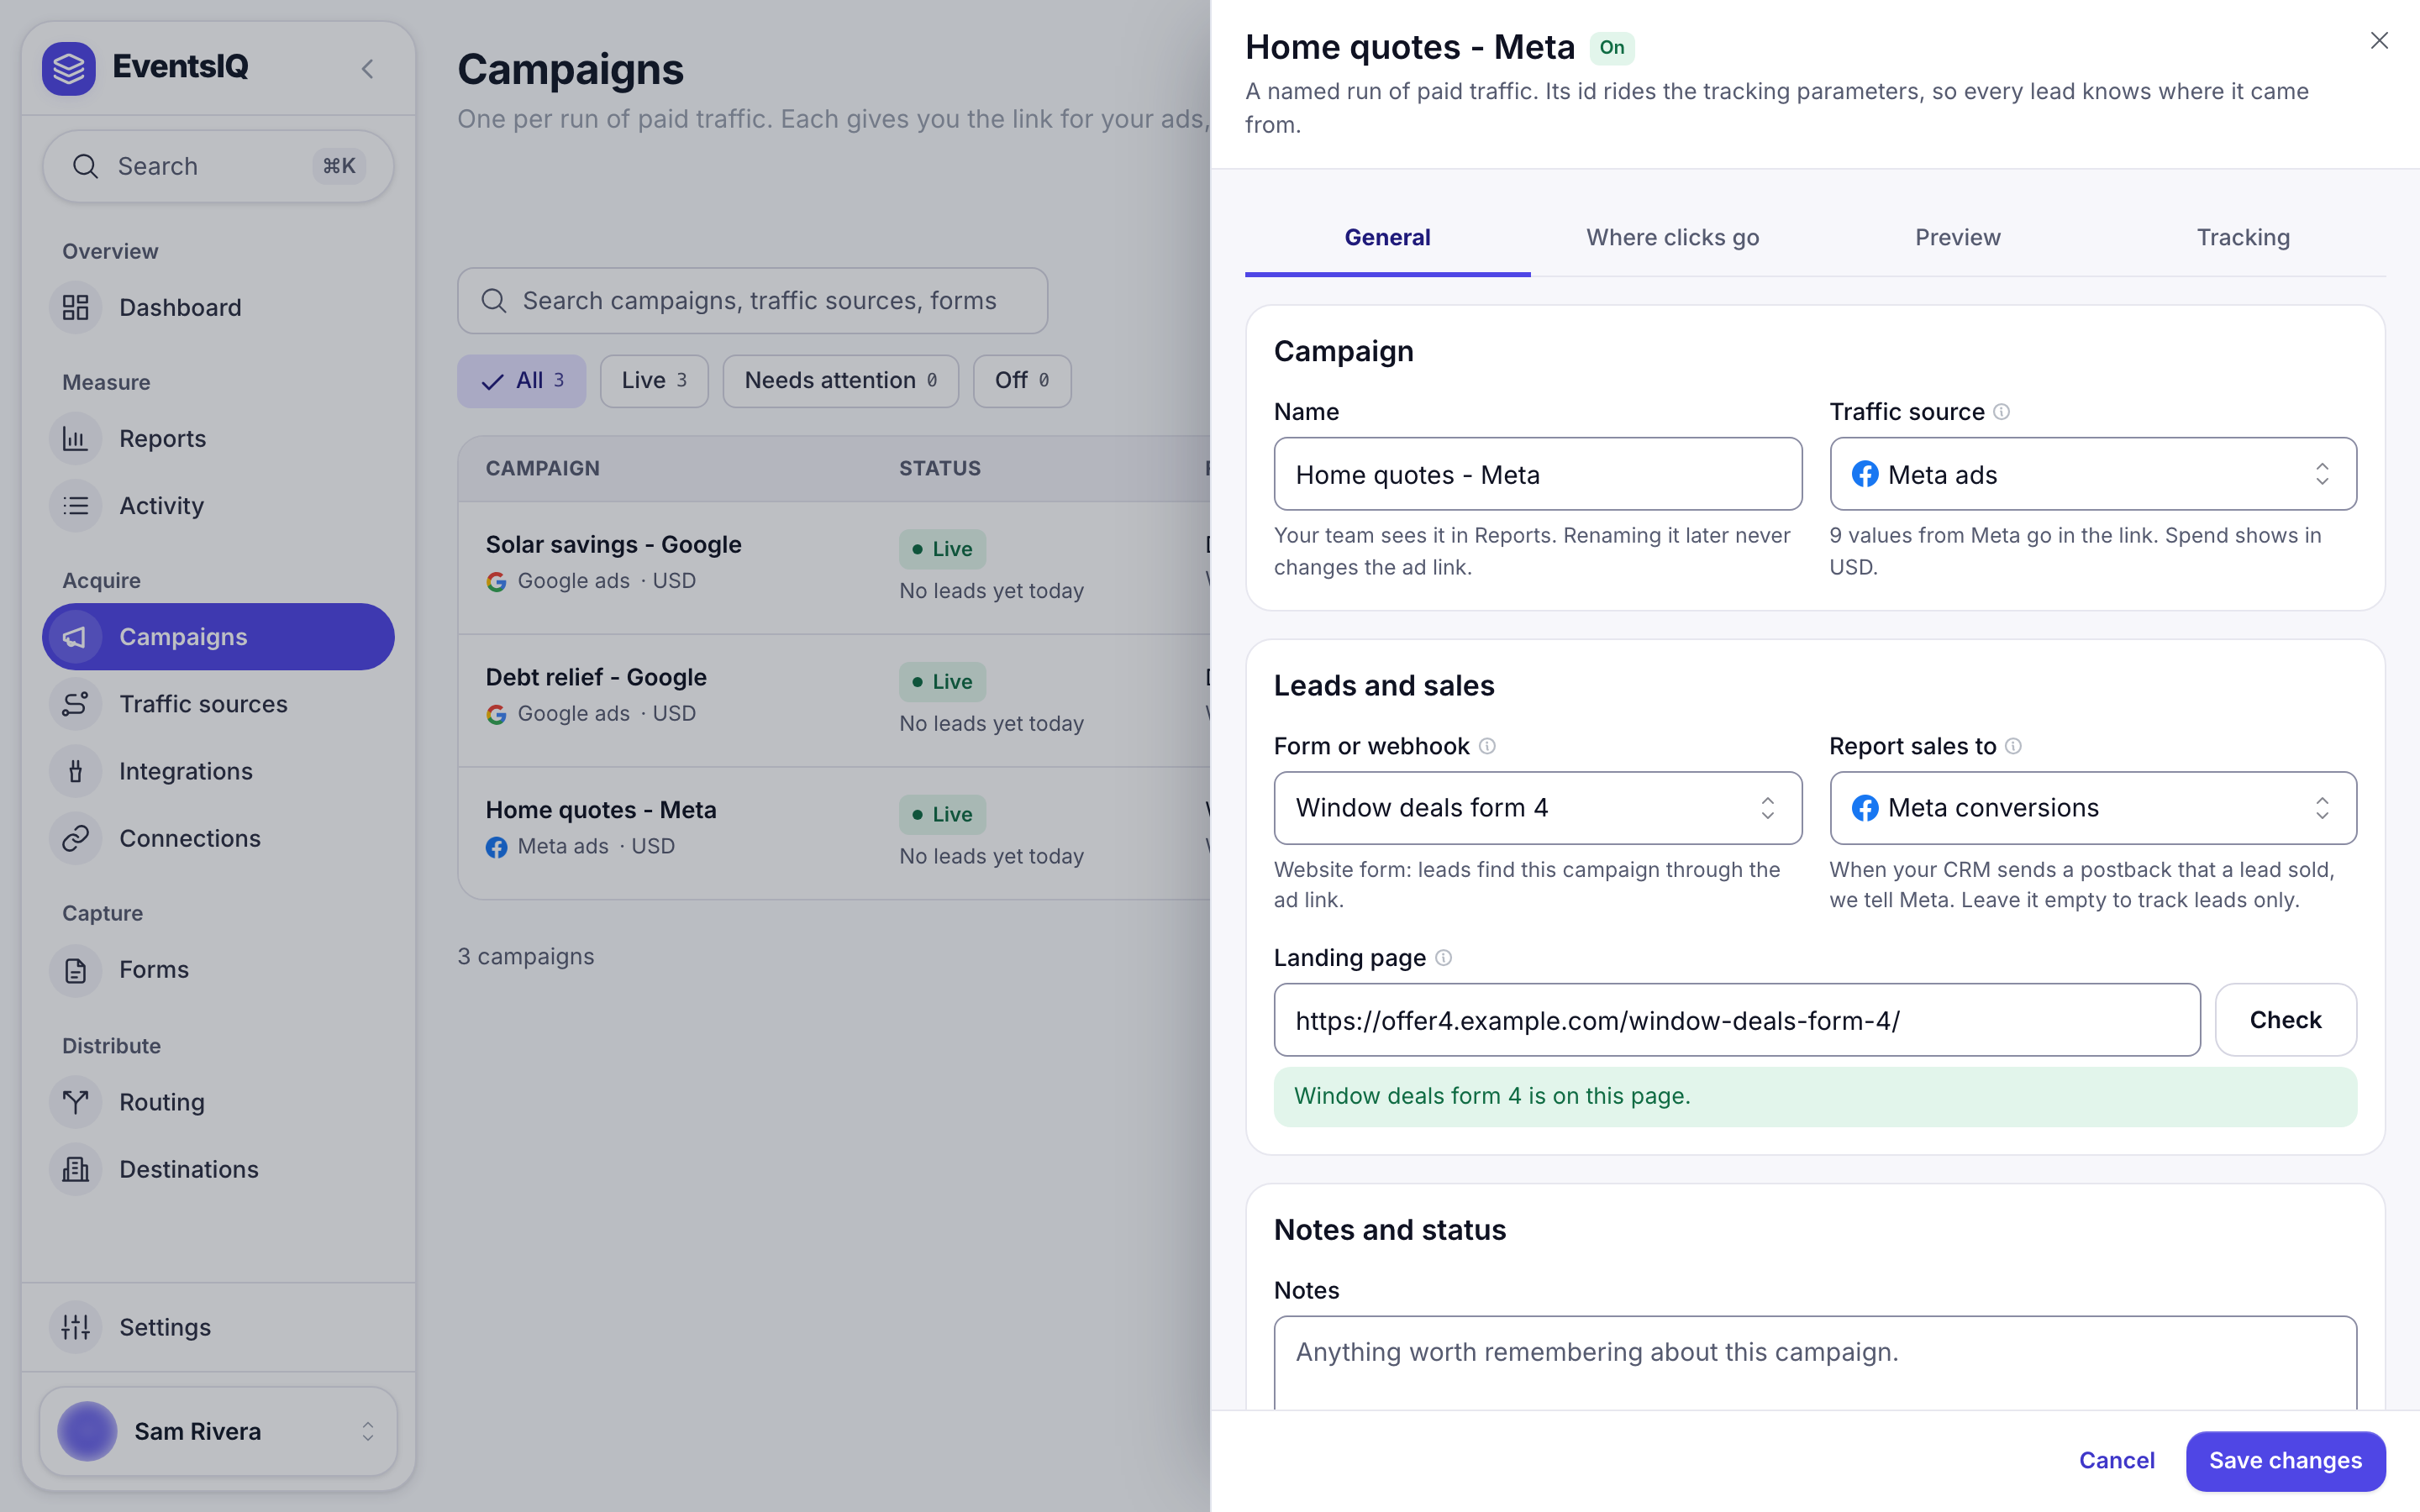
General
| Field | What to put |
|---|---|
| Name | Something you will recognise in Reports, for example Solar US - October |
| Traffic source | The one from step 3 |
| Form or webhook | The form this campaign's ads lead to |
| Report sales to | The Conversion API integration from step 5 |
| Landing page | The page the form is on. Click Check and EventsIQ confirms the form is really there |
Where clicks go
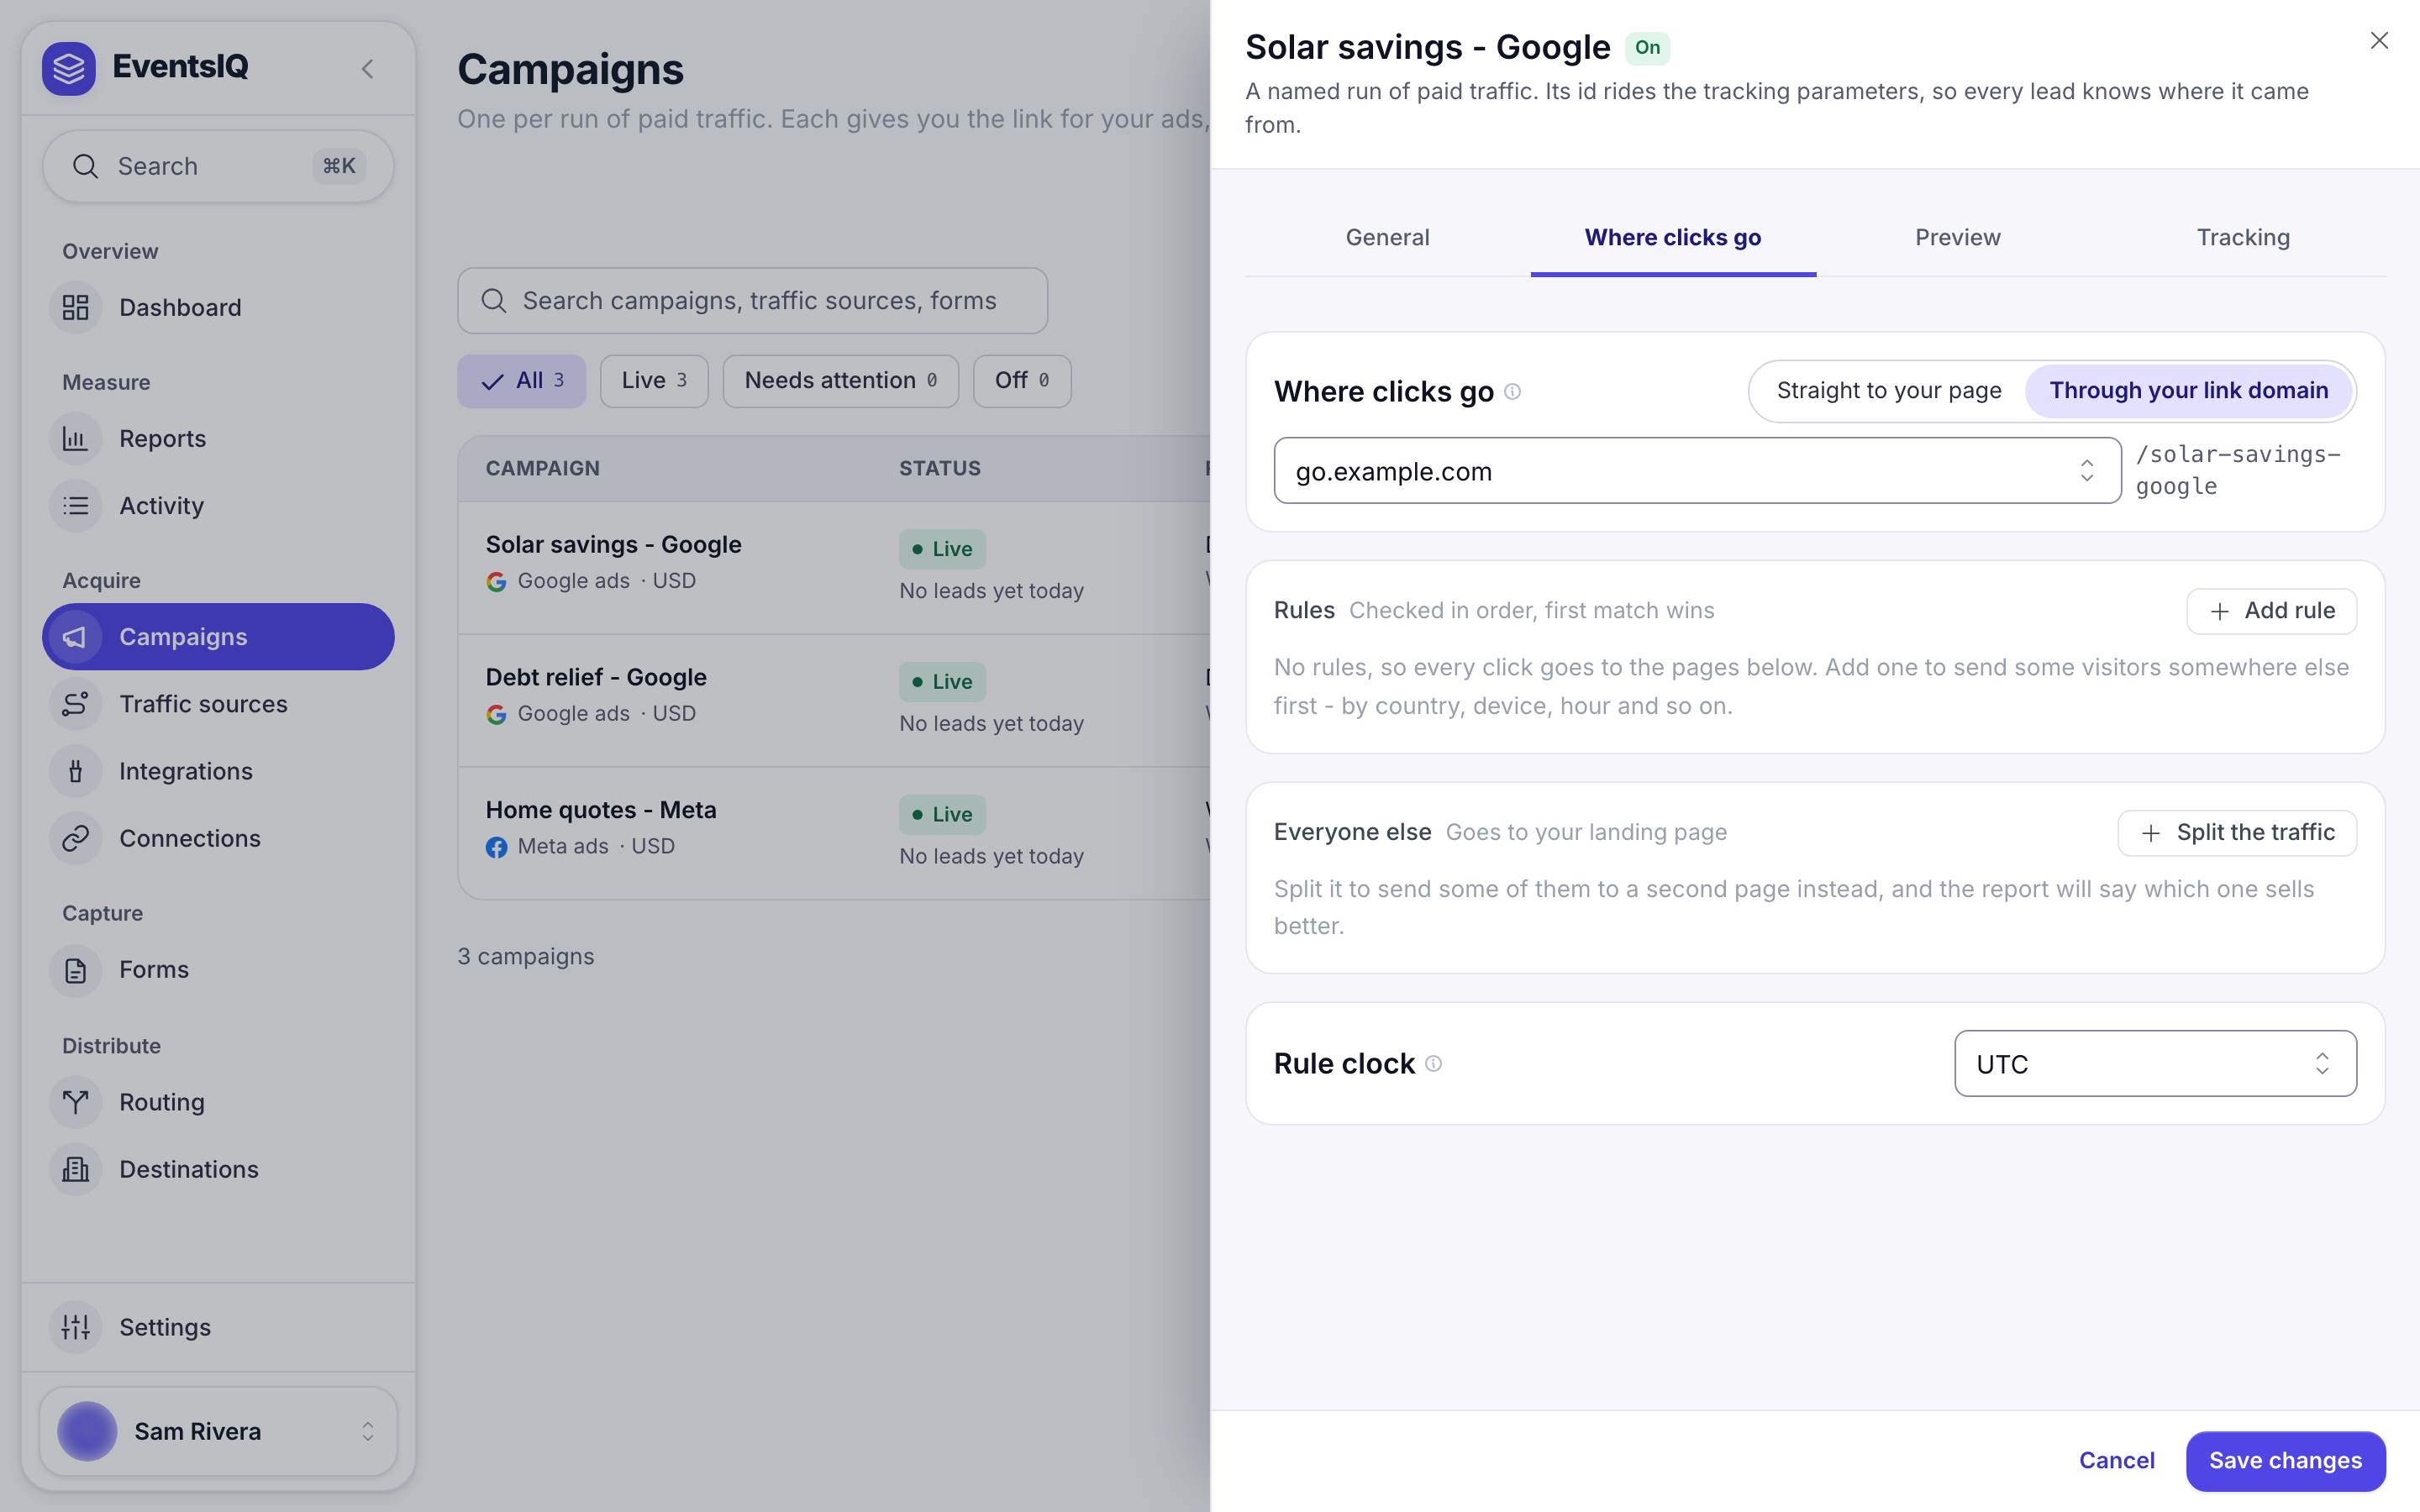
- Pick Through your link domain and choose your tracking domain. If you skipped step 1, leave it on Straight to your page.
- Everyone goes to your landing page by default. To test two pages against each other, use Split the traffic and add the second page with a weight.
- To send some visitors somewhere else, for example mobile visitors to a mobile page, click Add rule. Rules are checked in order and the first one that matches wins.
Click Looks good. The campaign is saved and the Preview tab shows the path a lead will take.
Tracking
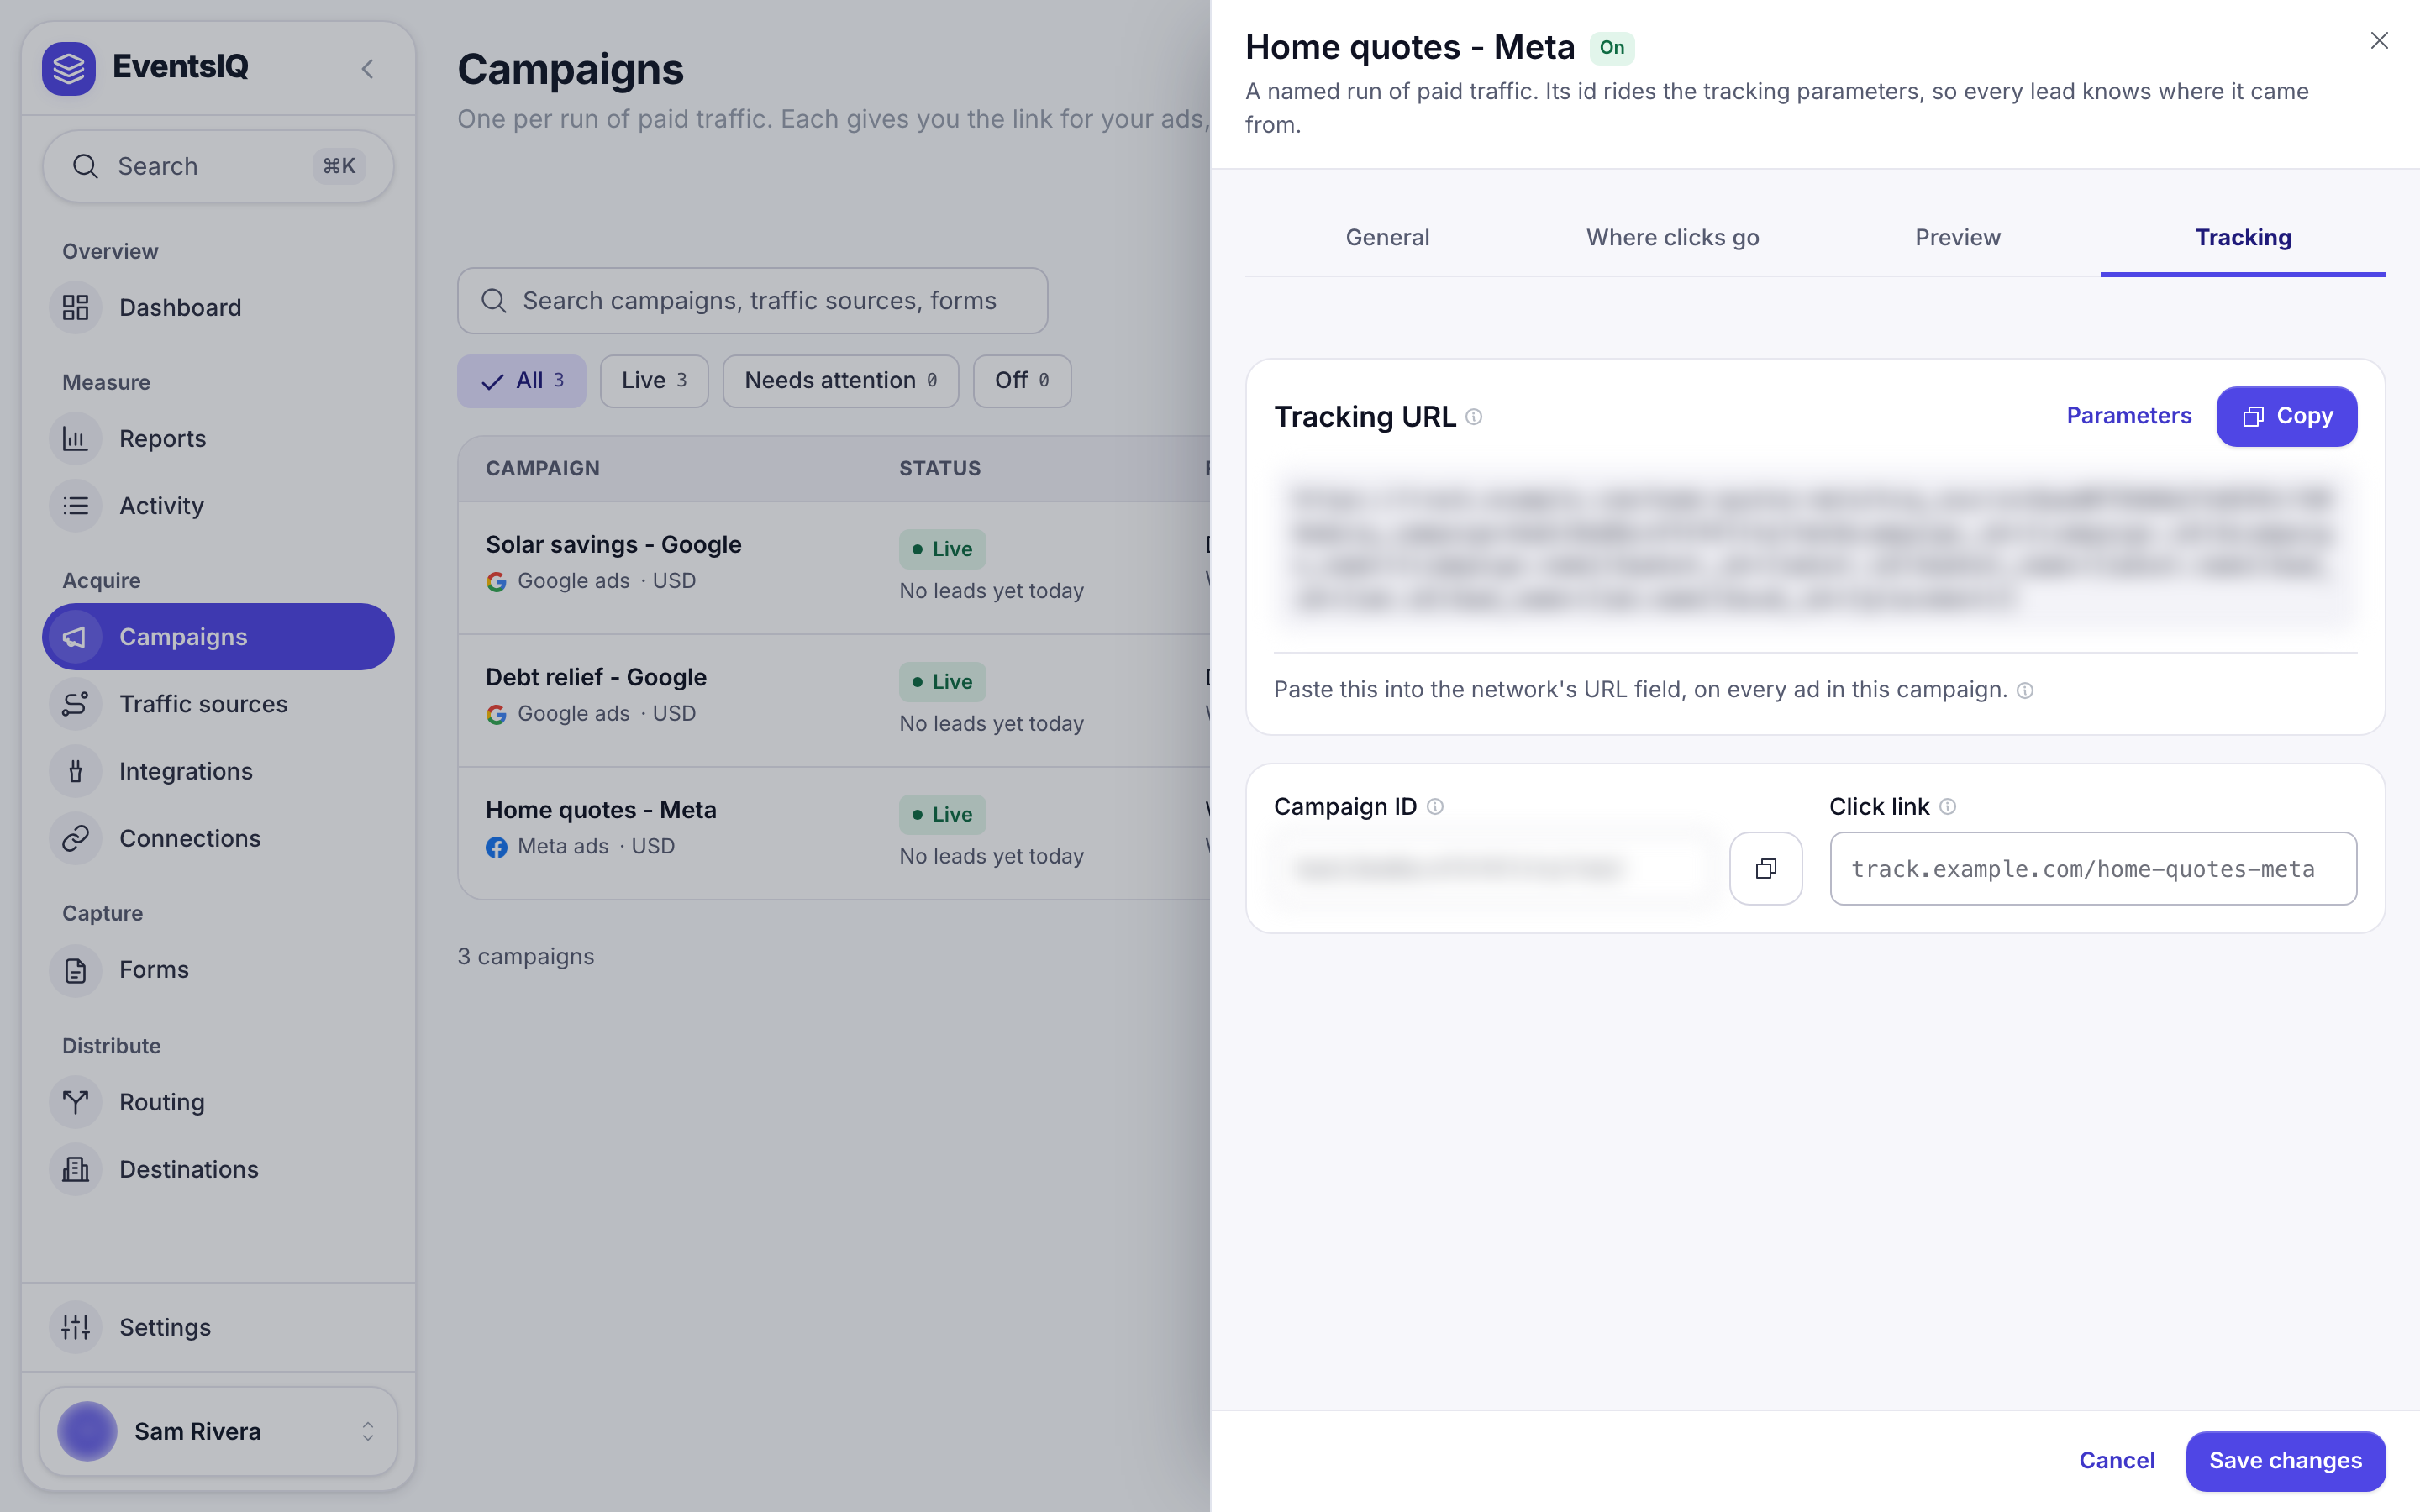
Open the Tracking tab. The Tracking URL is the link that goes in your ad.
Step 7: Put the link in the ad
| Network | Where it goes |
|---|---|
| Meta | Paste the Tracking URL into the ad's Website URL. Do this on every ad in the campaign. |
| TikTok | Paste the Tracking URL into the ad's destination URL. |
| Snapchat | Paste the Tracking URL into the ad's website URL. Snapchat adds its own click id, ScCid, to each click. |
| Pick Straight to your page. Keep your landing page as the Final URL and paste the Parameters into Final URL suffix. |
Google Ads checks that an ad's final URL is on the same domain as the page people end up on, and adds
its own gclid to every click. Going straight to your page keeps the landing page as the final URL, and the
form on the page still records the click.
If the campaign runs on a Facebook, TikTok, Google or Snapchat instant form, there is no link. Pick the network's campaign under Ad campaign on the General tab instead, and the network names the campaign on every lead it sends.
Step 8: Test it
- Open the Tracking URL in a private browser window. You should land on your page.
- Submit the form with test details.
- Go to Activity → Lead logs and open the lead. The click it came from shows the campaign, the link and the click id.
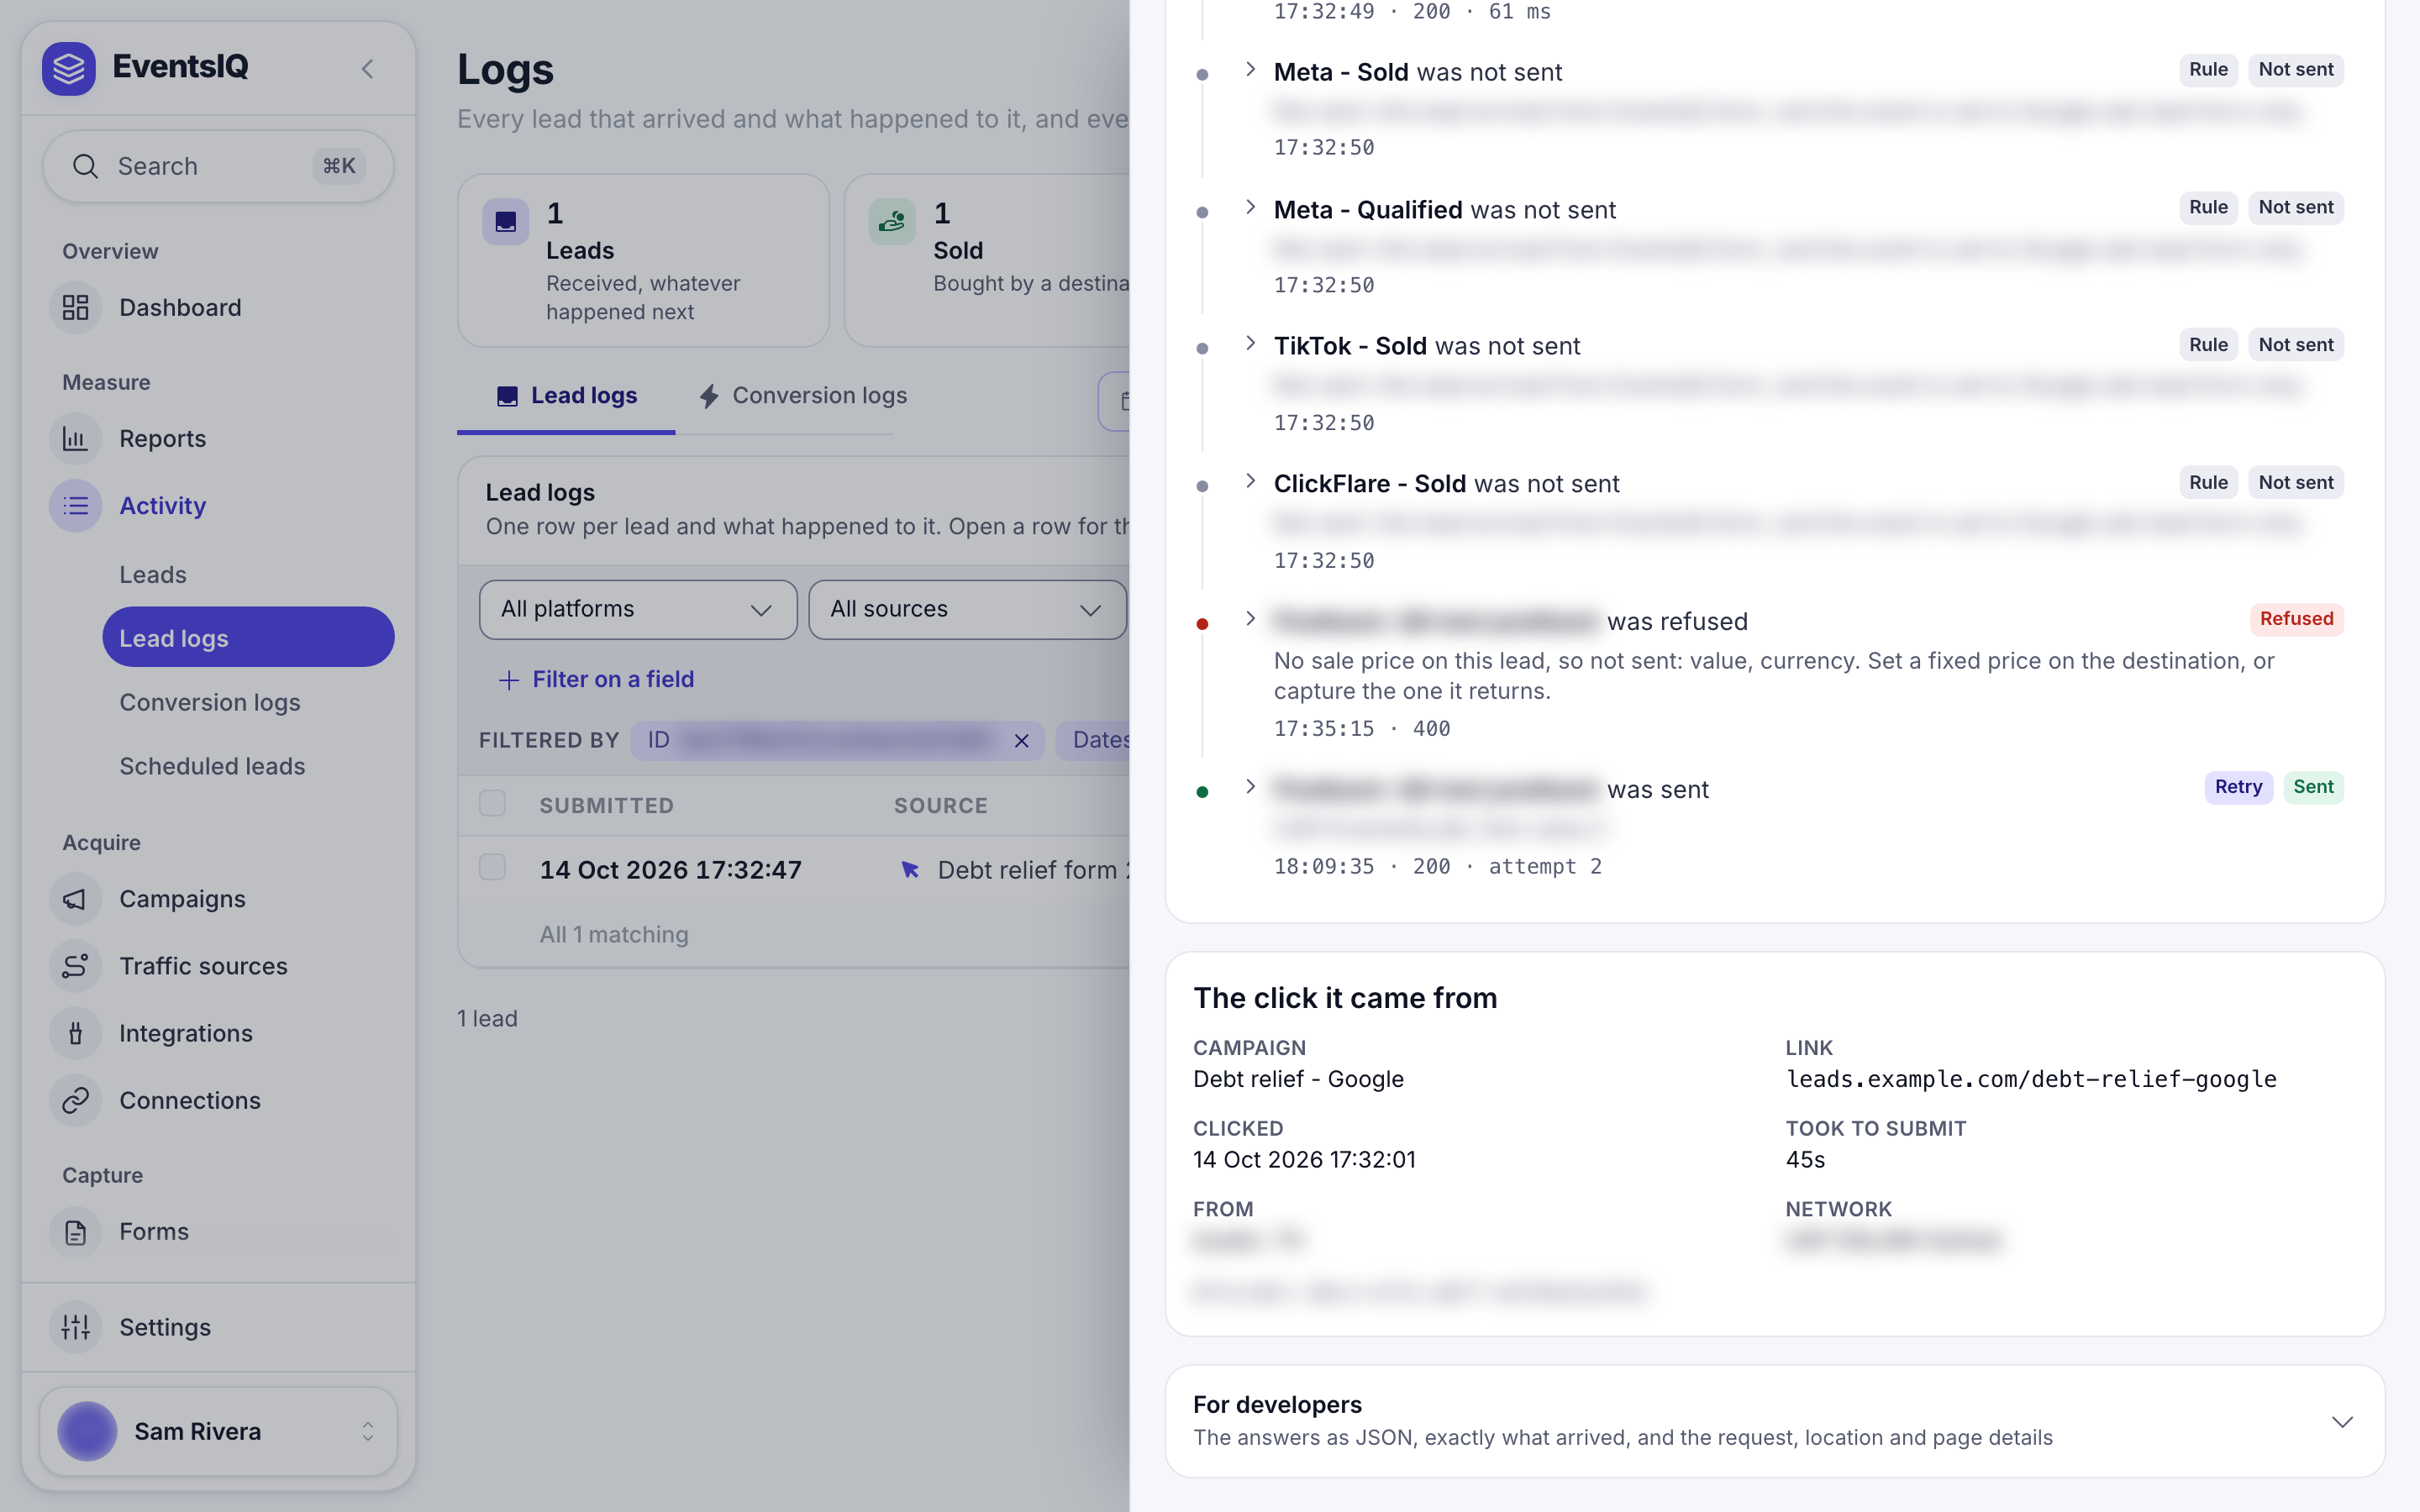
If the panel says the click has not been recorded yet, wait a few seconds and reopen the lead. The click joins the lead on its own.
Step 9: Connect your CRM's postbacks
Copy Your postback link from Settings → Postbacks. It looks like this:
https://app.eventsiq.io/cv?click_id={click_id}&event=sold&value={value}&key=YOUR_KEY
Give it to your CRM, replacing {click_id} and {value} with however your CRM writes those. Your
CRM needs the click id, so pass it along when you send leads there: the token is
{{runtime.eiq_click_id}}. Bodies written with the older {{runtime.formwork_click_id}} still work.
To test it by hand, use the click id from step 8:
curl "https://app.eventsiq.io/cv?click_id=PASTE_CLICK_ID&event=sold&value=250&key=YOUR_KEY"Then open Activity → Conversion logs. You should see a row for the postback and the event sent to your pixel or Google Ads account. A second call with the same click id and event is answered but not sent again, so a CRM that retries never reports one sale twice.
Step 10: Watch the numbers
Go to Reports. It opens on By ad campaign: one row per campaign as the network names it. Within an hour of the first spend sync, each row shows Spend, Revenue, Profit and ROAS. Click Sync spend to pull spend right away.
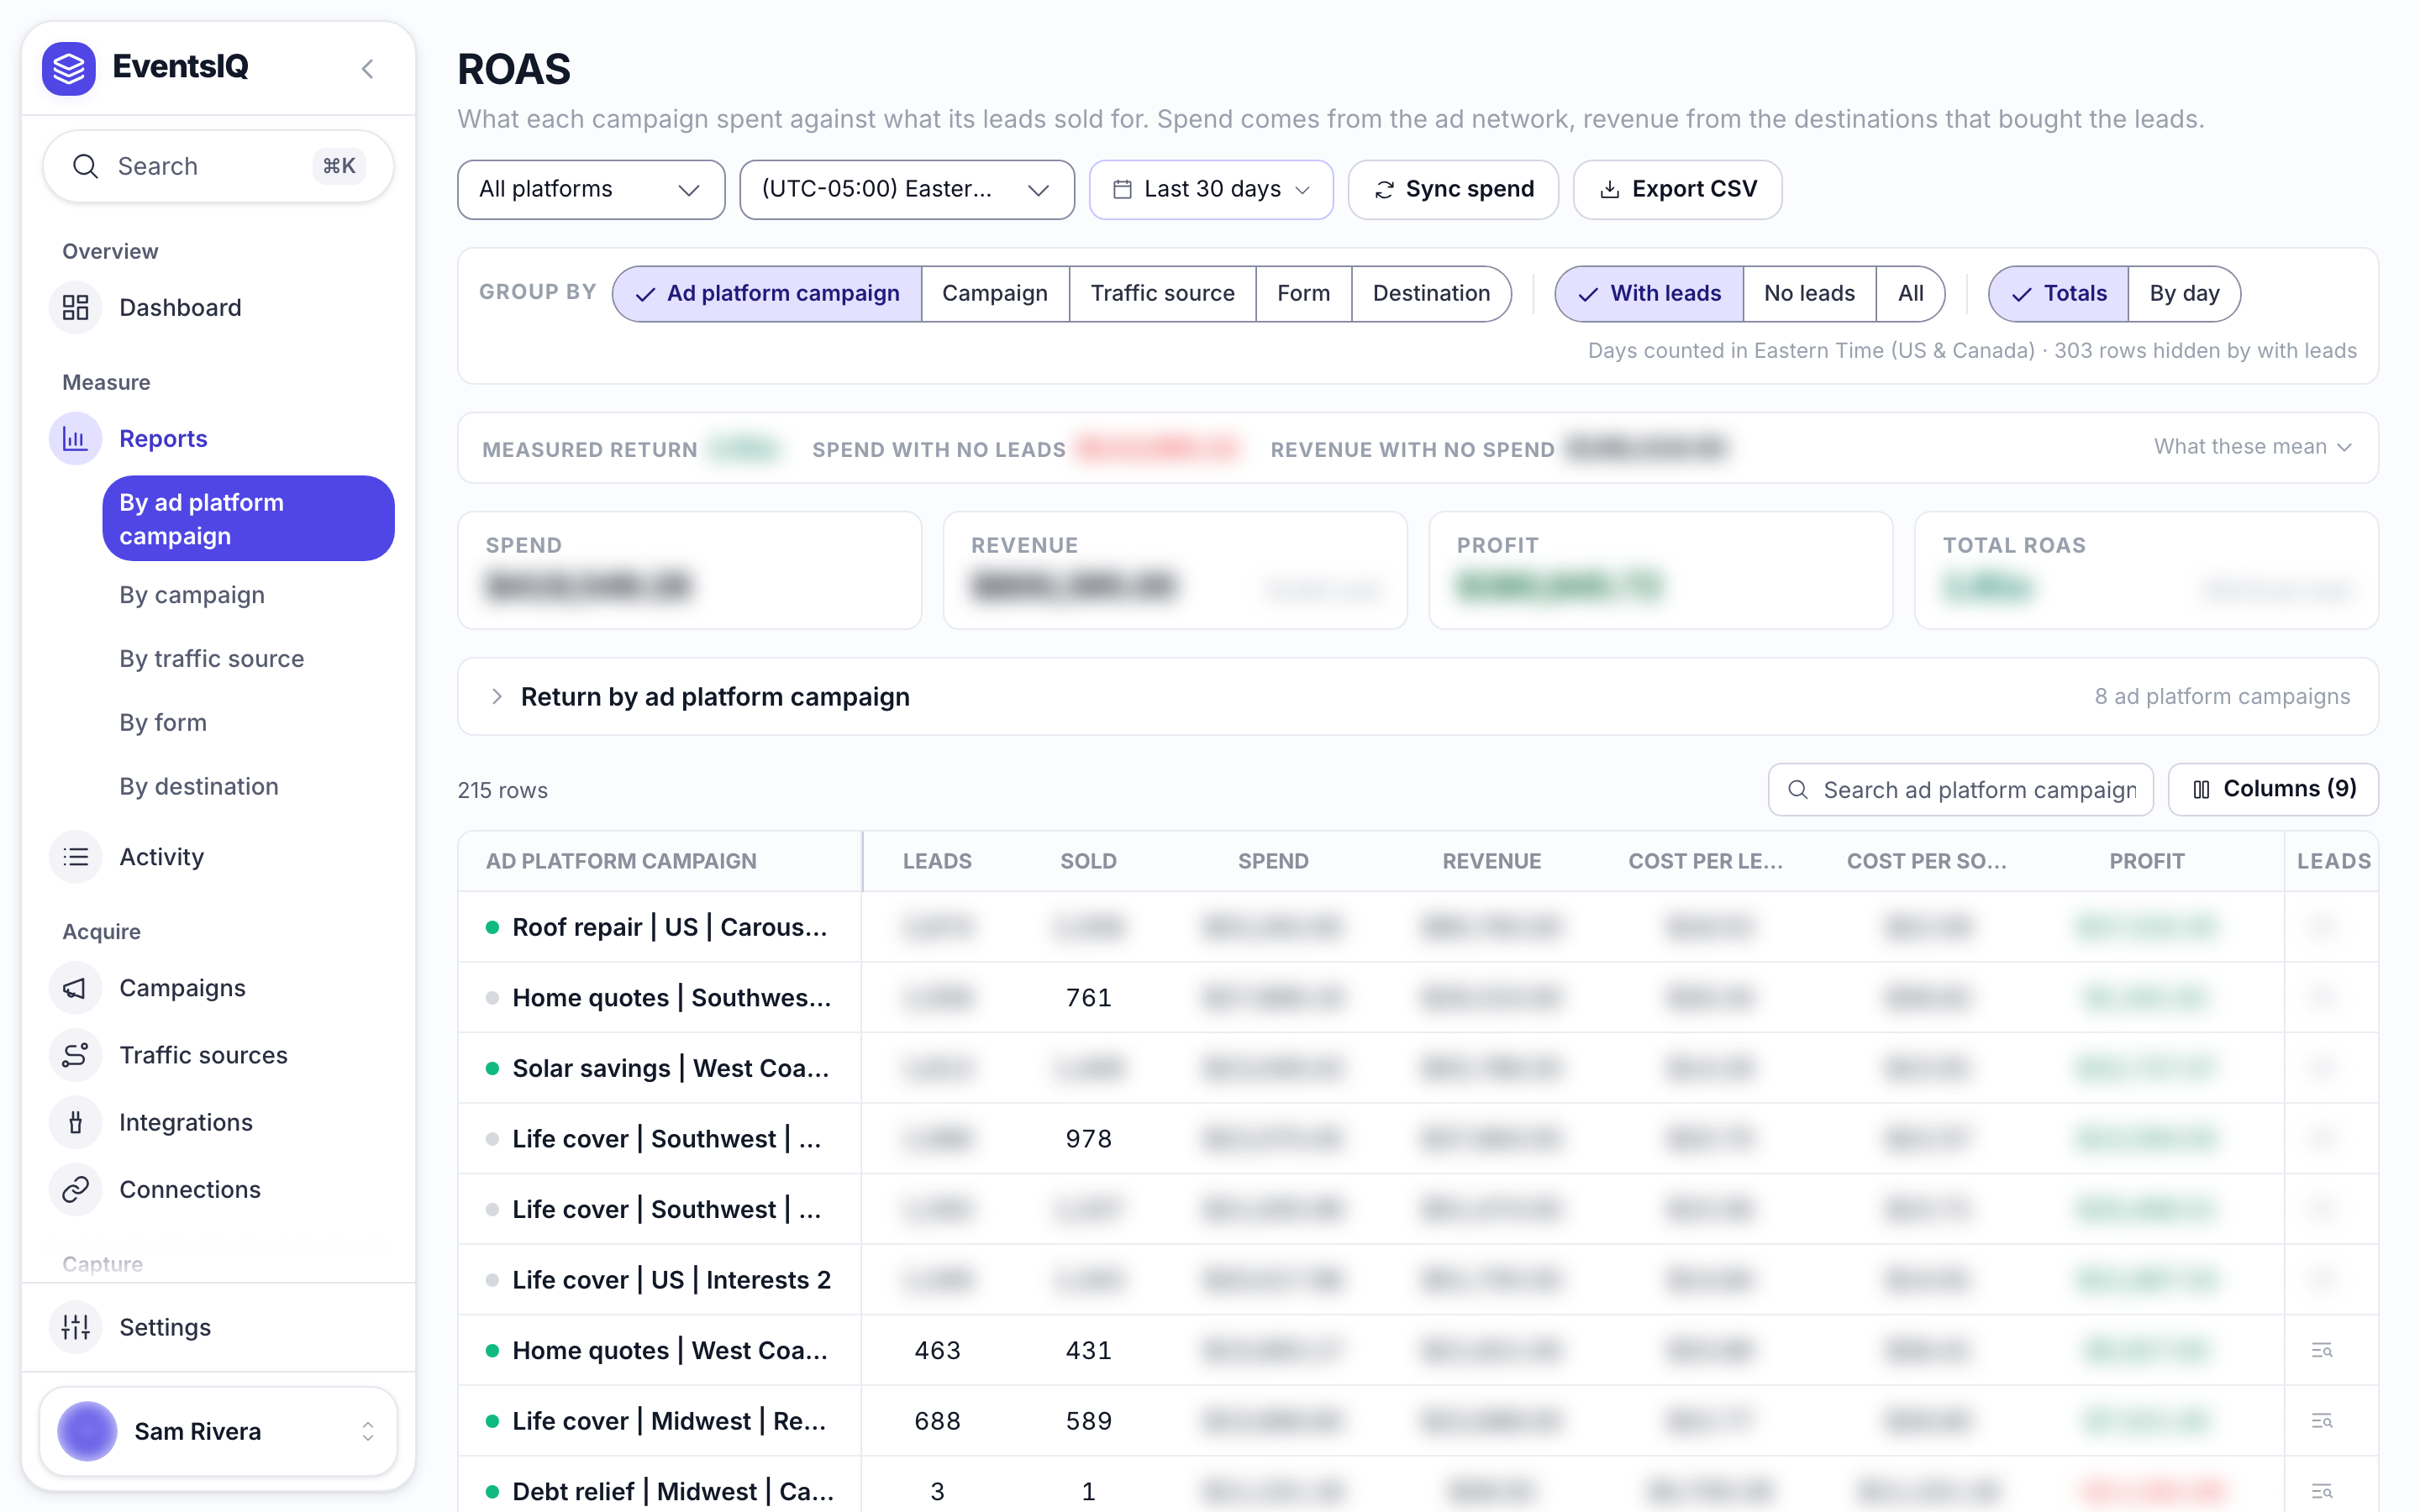
To see the same numbers rolled up by your own campaigns, with tracked clicks and split tests, switch Group by to Campaign.
Troubleshooting
- The ad is pointing at the landing page directly instead of the Tracking URL.
- The landing page drops query parameters on its way to the form, for example a redirect from
httptohttpsthat loses them. - The form on the page is not the EventsIQ embed, so nothing reads
eiq_click.
- The traffic source lost its campaign_id row, so leads carry no network campaign id.
- For instant forms, the campaign's Ad campaign is not set.
- The cost tracking integration reads a different ad account from the one the ads run in.
Open Conversion logs and find the Postback row. Its reason names the missing piece: the event is not defined, the campaign has no conversion integration, or the integration has no row for that event.